
Block Sanding
Assembly Shop
Organize & Prep
Bucket Seat
Bench Seat Foam
Seat Sides
Door Panels
Convertible Arm Rest
Head Liners
Trunk Panels
Old Style Coils
Dash Board Covers
Chest Restraint
Three Head Rest
Convertible Tops
Color Selection
Paint Booth
Polishing
Vinyl Dying
Wood Shop
Burl Wood
Wood Cab
Wood Doors
Console
Wheel Spokes
Headliner
Kit Fitting
System
Blocks
Trim Prep
Seats
Fiber Glass
Truck Bed
Body Align
Body Fabrication
Body Lead Work
Brace Fabrication
Dent Removal
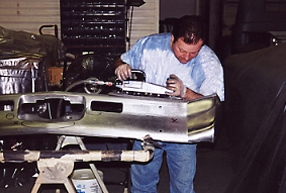
Bumper Prep
Fiberglass
Frame Mount
Body Gaps
License Plate
Pot Metal Repair
Re-Body
Roof Replacement
Rust Patches
System
Trim Gaps
Media Blast Process
Dissassembly
Parts Organization
Parts Search
Detailing
Shipping
Parts Rebuild
Misc
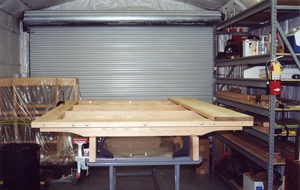
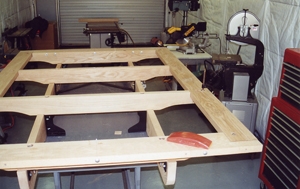
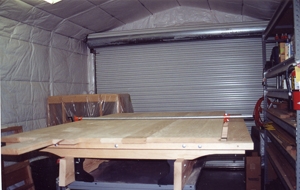
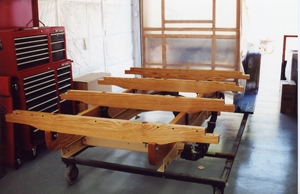
Side Panel Plans
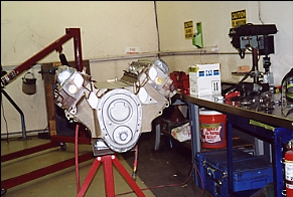
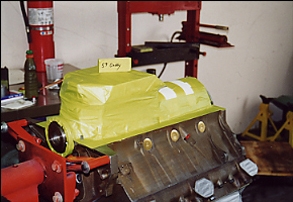
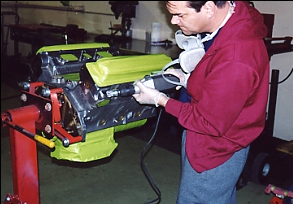
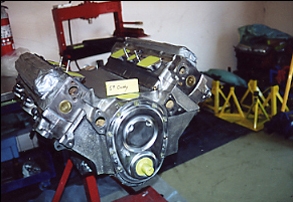
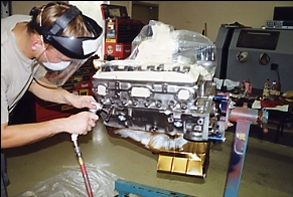
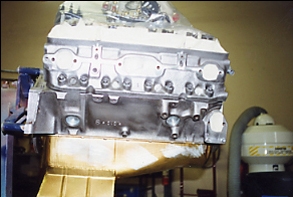
Engine Prepartion
Body Align
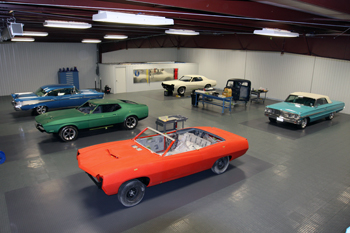
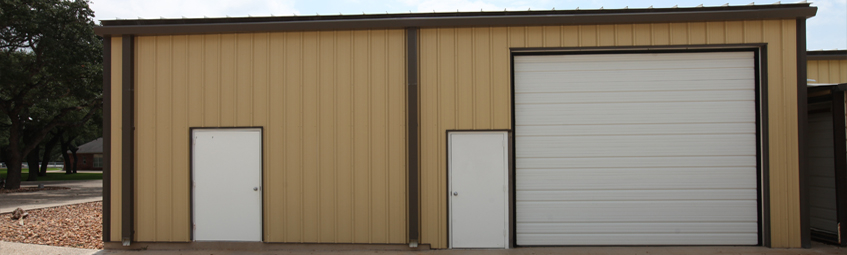
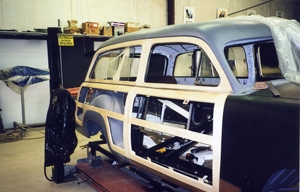
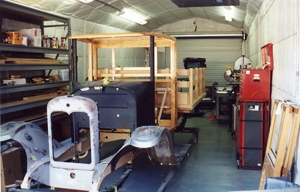
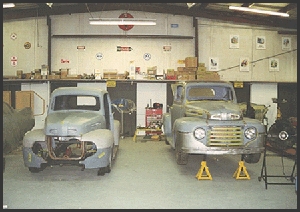
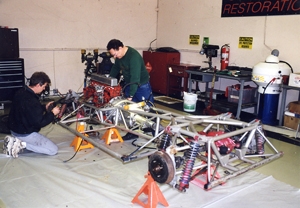
Our assembly shop is divided into 3 - 5,000 square foot sections. As seen the center section has room for 8-10 projects being assembled at the same time with plenty of room to spare!
The shop features a dust free environment that makes the difference in details before we hand you the keys to your dream ride.
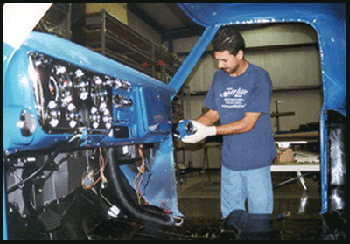
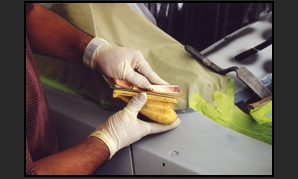
Each final assembly technician uses latex gloves to handle parts during assembly. The moisture/acid from a human hand can tarnish plating finishes. We do what it takes to give you the finest product.
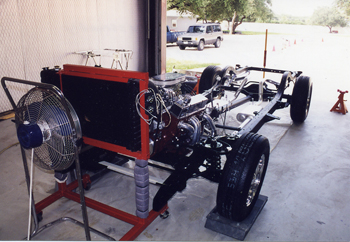
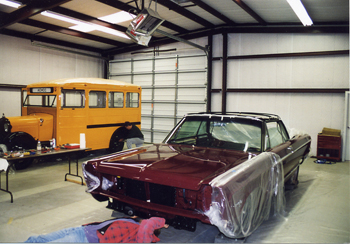
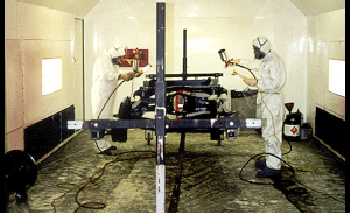
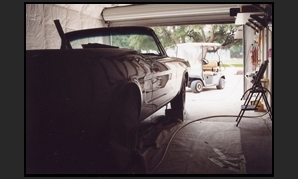
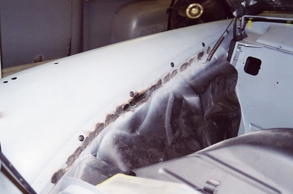
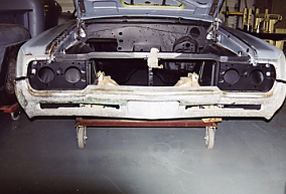
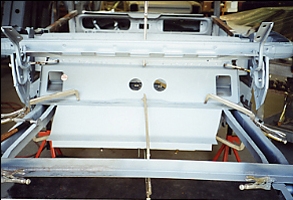
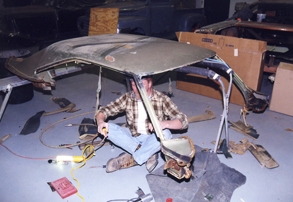
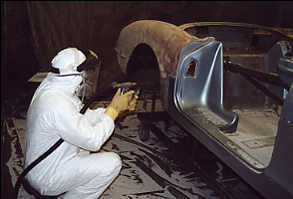
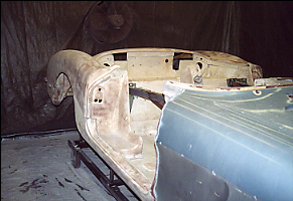
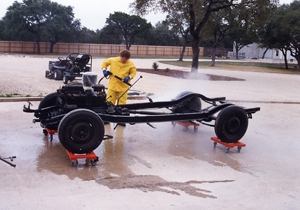
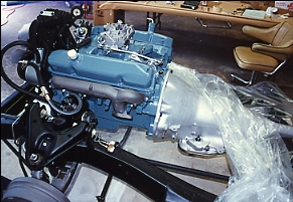
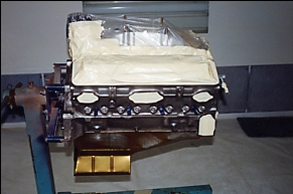
With every frame off body project we build, the drive train is usually test run and tuned before the body is dropped.
As seen the testing is done and the chassis is completely wrapped in several layers of plastic for dust protection. We are now dropping the body for the final time. We will then do a final body block sanding and then paint. This must be done to allow the body to stabilize in its final support mode to ensure world class body and paint results. " Never sell wine before its time"

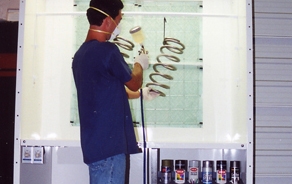
Welcome to our upholstery shop! We are ready to build your original and custom seat desires.
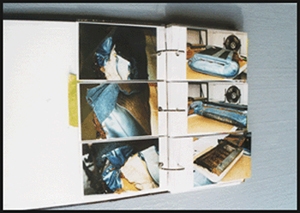
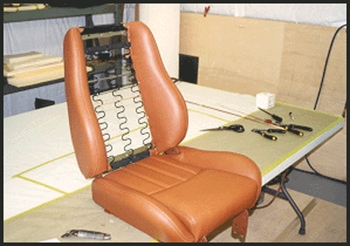
If we are restoring an original vehicle we start by disassembling the existing seats and photographing them extensively. This helps make decisions on foam thickness, wire supports and shape/style. During a StreetRod or Custom project we often purchase new original and custom seat frames from American and Foreign vehicles, if the customer likes a particular style or look. We then recover them to match the vehicle/customer taste.
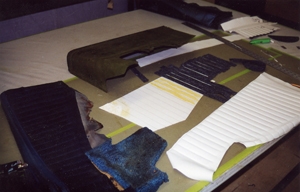
A few samples of the many materials we offer. After matching your original materials or selecting the shade range of your choice on a custom project, we can send you appropriate selections for your viewing decisions. Mohair to Leather/Vinlys etc any color fabric you can imagine, welt cords, headliners, vinyl and convertible tops etc. We can design anything your heart desires!
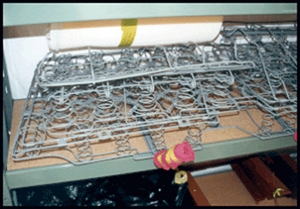
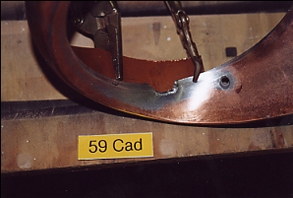
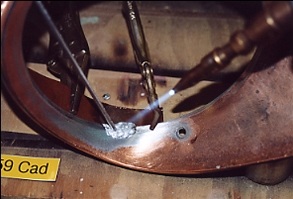
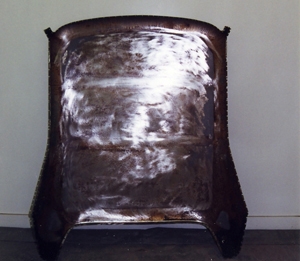
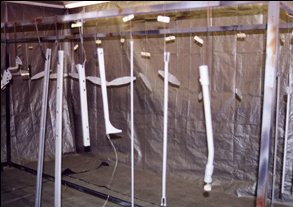
As seen these springs were blasted white metal clean after wire repairs and/or modifications were done. We then painted them to match the materials to be used!
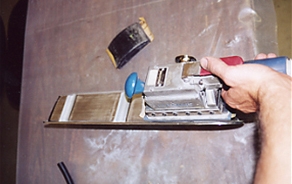
Simple tools such as this turkey cutter are easy to use and the results are evident.
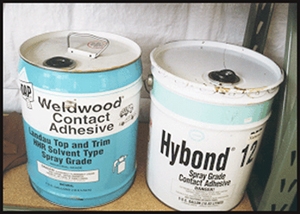
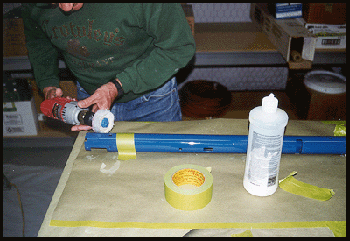
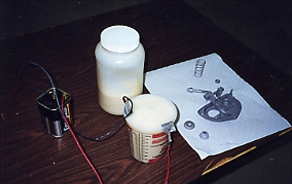
Depending on the type of foams needed different glues are used to adhere them together. We use pressure pot sprayers and aerosol cans with different adhesives to get the job done.
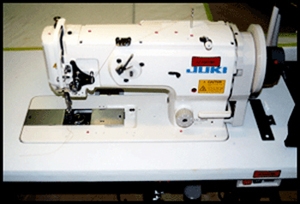
The JUKI assist us in accomplishing our goal. Quality beyond boundaries.

The JUKI assist us in accomplishing our goal. Quality beyond boundaries.
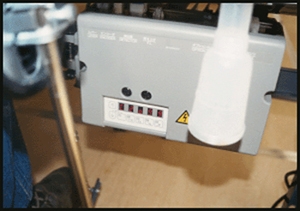
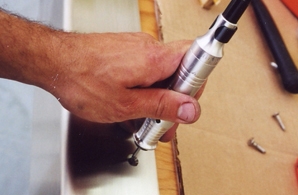
The JUKI Motor is the brain of the outfit . It can be electronically programmed to how many stitches per inch you want and the time it takes for those stitch numbers to take place. This allows us to sew at a comfortable pace which enables excellent French seams!
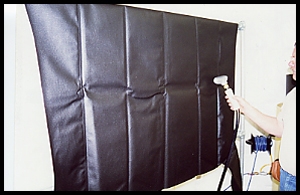
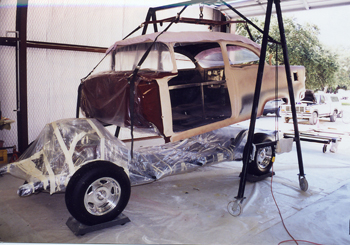
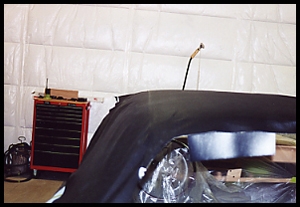
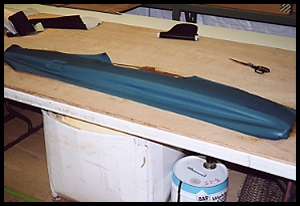
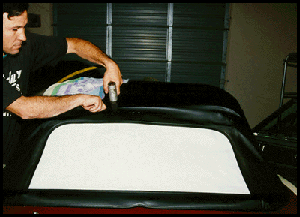
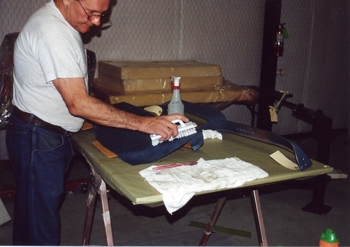
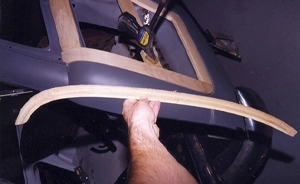
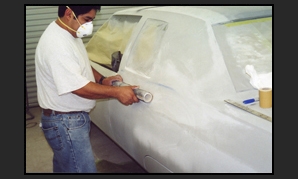
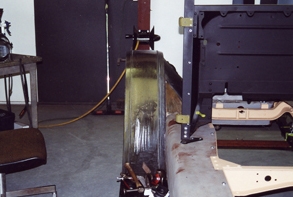
We can Mfg our own tops or install pre-made covers. This pre made has been stored in a box from the supplier and has numerous wrinkles down the center. Monte is steaming out all the wrinkles with our Jiffy commercial steamer using distilled water to avoid any residue during the procedure.

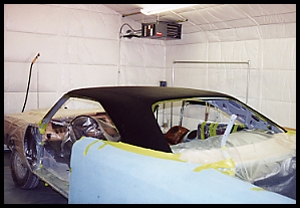
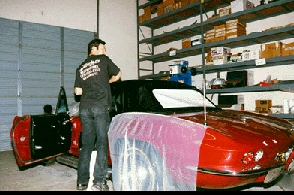
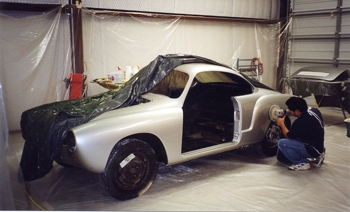
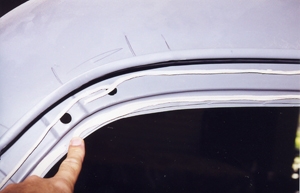
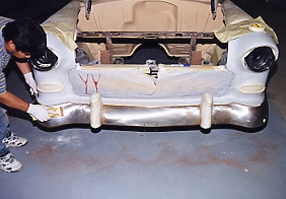
We have masked off the body with plastic, prepped the top and covered the qters with thick protective blankets. This will keep us from marking the paint and or body work when tugging, pulling and wrestling the cover in to place.
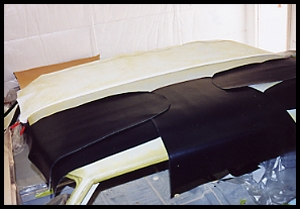
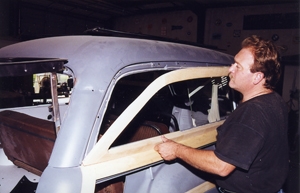
As seen Monte installs some disposable pull sheets of vinyl as he will leave them in place to keep the top from sticking down during the initial fit and adhesion of the center section.
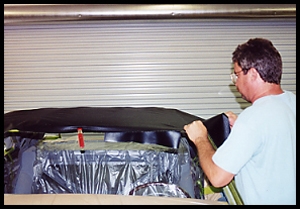
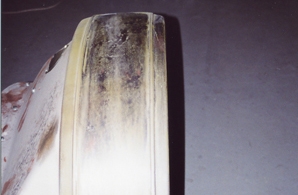
He sprayed glue on the roof and cover and let them set for about 15 minutes. Once he is satisfied with the fit of the center section and it is straight and true with no wrinkles he starts to pull down the sides and removes the "pull sheets" installed earlier one by one as he pulls and tugs the cover in to skin tight shape
As seen the outer top to sides is starting to take shape. The correct procedure for stretching properly is critical. Monte makes it look easy as he will get it tighter then a leopards skin.
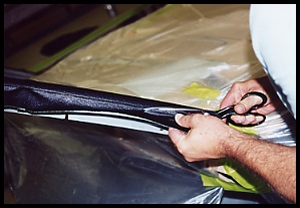
As he continues pulling the cover and allowing the adhesive to set up and permanently adhere, a bit of trimming takes place around the drip rail area.

After he finishes up the final adhesion pulls he rolls the drain gutters tight also. This not only looks good but is mandatory if a drip molding is to be attached.
Just like fine wine is exquisite to the most demanding taste, a vinyl top installed with no bubbles or wrinkles and straight as any critical eye could imagine the project is finished. Once again Monte gets it done.
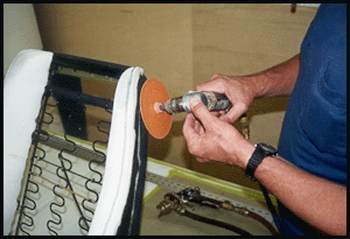
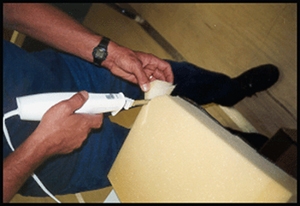
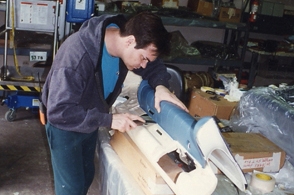
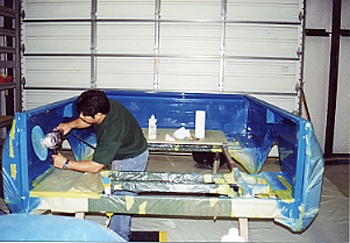
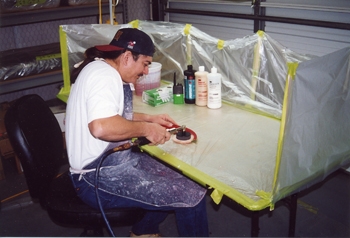
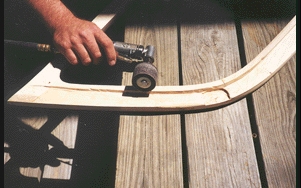
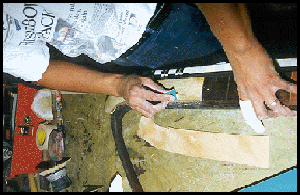
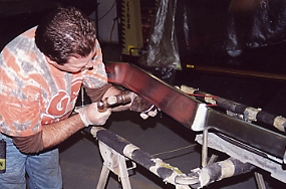
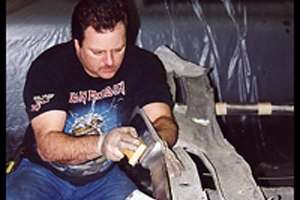
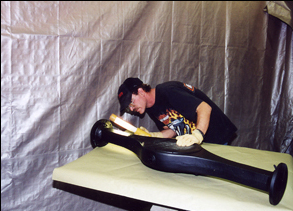
On custom seats or factory foam that is not adequate we glue and add foam where it is necessary to support the outer materials for both quality and longevity. Here Ray is custom contouring foam to exact tolerance with an 1800 rpm hand grinder. Like anything the foundation is what really makes the difference.
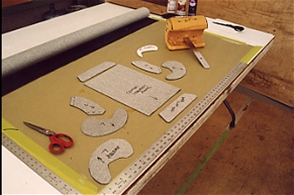
Final fit of all vinyl templates. We are pleased with the style and our Customer gives us the thumbs up to proceed.
Senco stapler is used to pull down and hold all materials from the back side such as door panels.
We always check fit for quality control, Looks good !
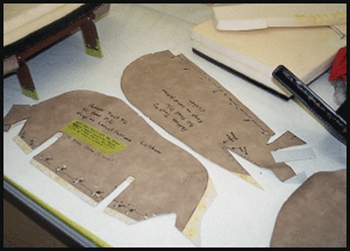
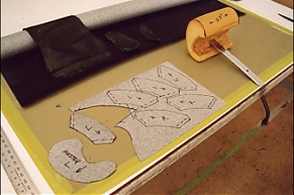
Our vinyl templates have been pre fitted, removed and we are now ready to cut some cow!
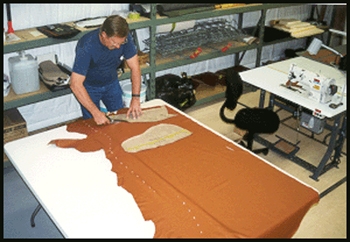
We lay out the templates on top of the new leather and start the cuts. We primarily use Garret leather for all of our hides because they offer some of the best in Italian, German, Asian and American cow hides. Grains will vary depending on what part of the world they are from.
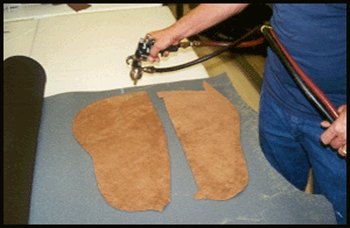
Ray applies glue to the back of the hides and then attaches a thin 1/4 inch foam to the back side before final trim and stitch.
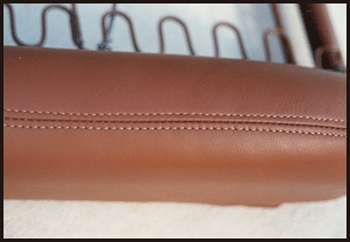
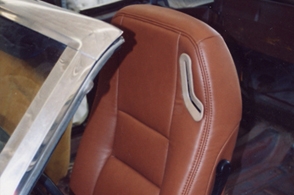
Multiple contours and many angles are the hardest thing for a trimmer to overcome. The results are evident on this close up of Rays work, AWESOME is the only way to explain it ! ! !
The custom seat is looking good as each section is fitted to the highest tolerance.
The custom seat is looking good!
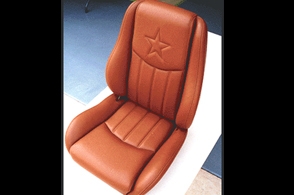
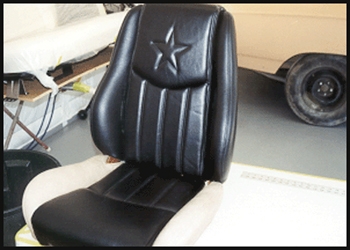
The finished product speaks for it's self. Note, the Customers Choice of Stars for his home in The Lone Star State!
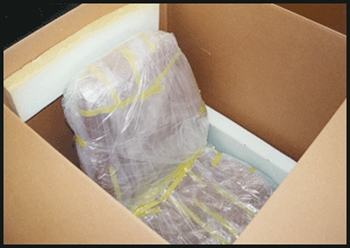
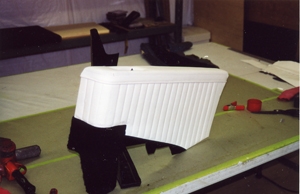
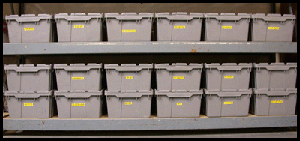
To keep the seats protected before they are installed we completely wrap each seat with plastic and install them into foam supported "no scuff boxes".
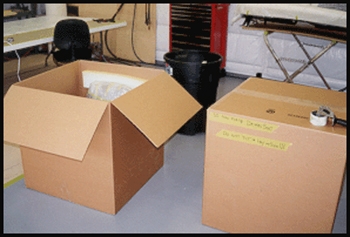
Upholstered seats packed safely away until installation day!

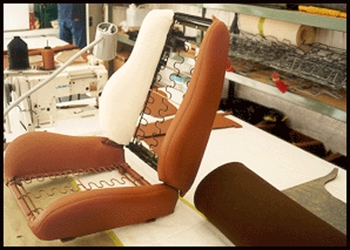
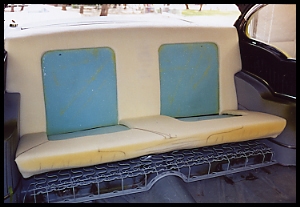
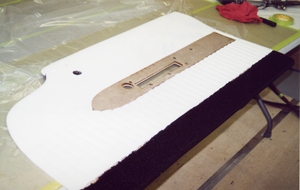
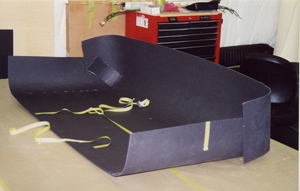
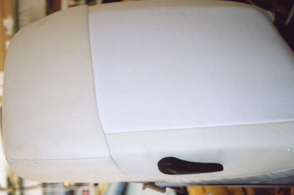
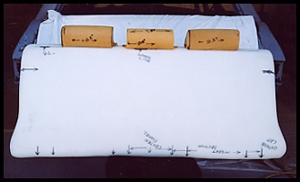
To achieve the ultimate results in upholstery there are several steps that must be followed in order to get the prize. The springs are the first step with replacing any broken and or weak springs and then clamping main wires to keep them straight. The bench seat lean backs must match each other from side to side. We have laid down the blue foundation foam. The grey foam is the first layer of foam for our desired deep set seat style that you will see unfold in the next pictures.
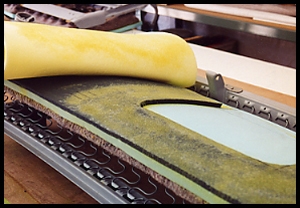
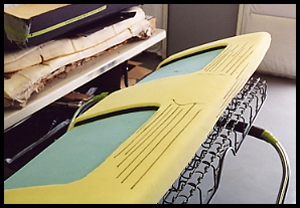
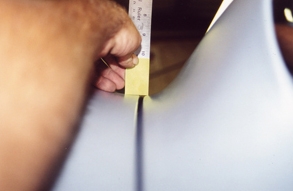
We now glue down our own custom cut "yellow shape foam" that defines our deep set style. Keep in mind that this is a custom project so it is imperative that you know how thick each section is to end up with your desired look and support of the cover, be it cloth or leather.
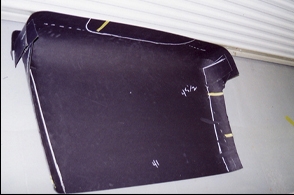
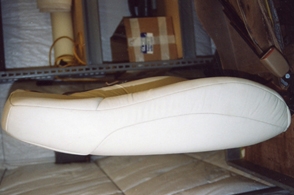
Covered up, glued down and ready to radius cut the corners she is starting to take shape.
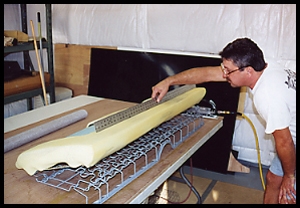
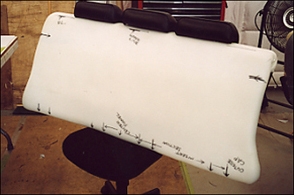
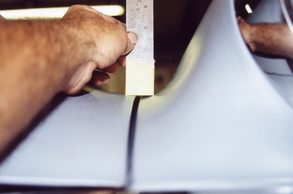
Monte checks out the foam base with a straight edge to see where it may need adjusted.
We marked out some low and high spots we were concerned with and we are now ready to shape it to the next level.

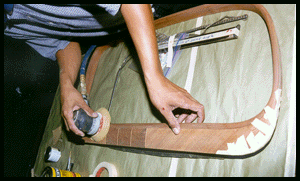
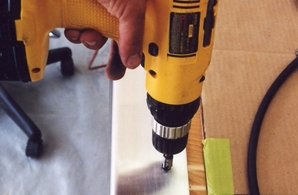
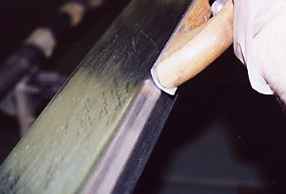
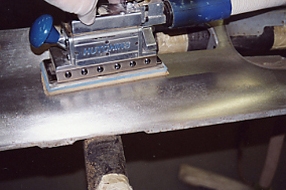
Using a board file with 80 grit sandpaper he levels out the "special" foam much like you would a body before paint !
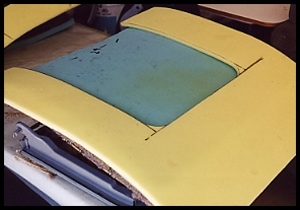
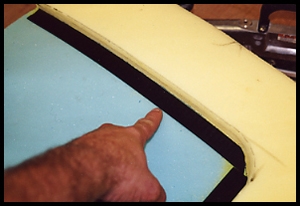
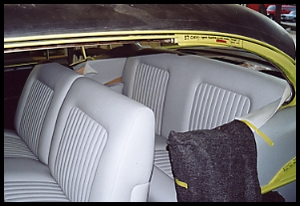
Next comes a seat fit to check the foam clearances in relation to the arm rests and rear package tray. It has been decided that we need to round the outside upper corners to allow for a smoother transition in these areas.
As a note! When doing deep set style seats we attach hook and loop material to ensure the inner seat panels will not move once lined up stitch to stitch with the upper and lower halves of the seats.
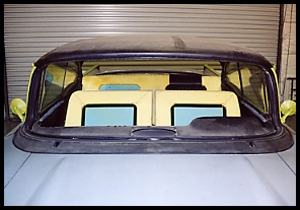
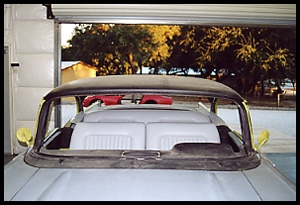
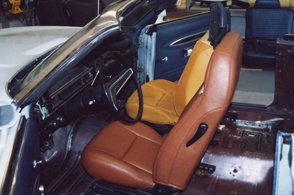
With the front and rear seats installed we get a good look with out the glass installed for the ultimate critiquing. While starting to slice and cut down the foam to achieve the look we want our Customer gives us the thumbs up to continue on with this style for his custom interior.

We mocked up the corners with leather to get the pattern and sewing stitch spacing dead on before cutting into the $600 per hide grey leather.
Another view shows the subtle yet stylish transition from the top of the seat to the package tray and qter window side panel.
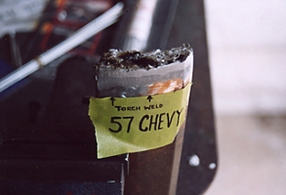
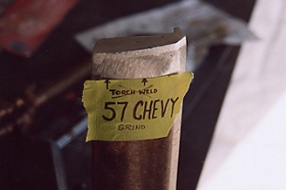
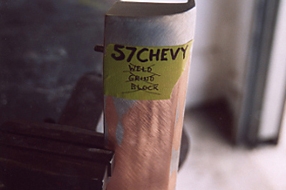
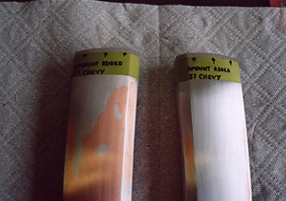
All the concerns were adjusted and the final covers were cut out, sewn up and stretched out to give the ultimate look for this 57 !
We will now remove the seats and plastic wrap protect them until the body is painted and final assembly takes place.
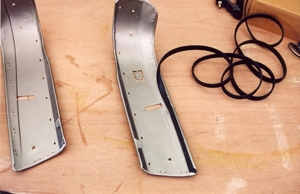
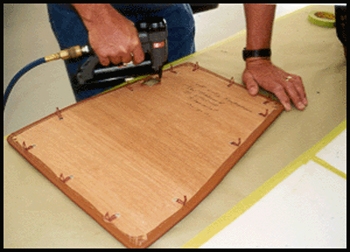
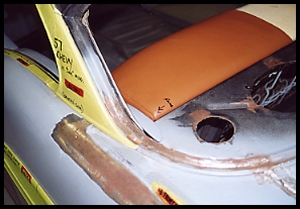
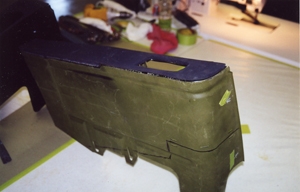
50s seats tend to be large and plush. These side "clam shell" covers for a 57 Chevy are first lined with tack strip to allow the materials to be stapled and held in place.
Riveted and glued down in place they are ready to be wrapped and leather stretched.
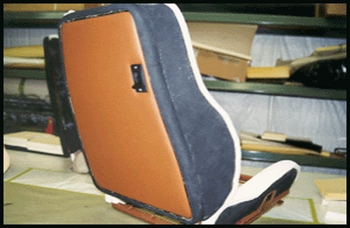
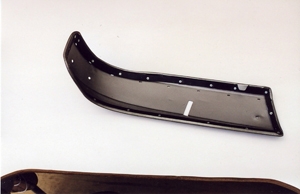
Grey leather that is wrinkle free and beautiful will compliment the seats nicely.
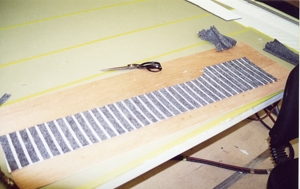
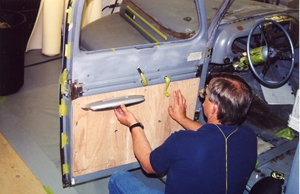
To lay out and build door panels takes a bit of time when building the best. Here we have luan wood panel 1/8 thick that has been cut out to fit the very outer edge of the door frame less 1/6 of an inch to compensate for foam and upholstery material such as the leather we are using. We have laid out 3/16 th thick pad strips for spacers to allow the pleated look on this 59 Caddy.
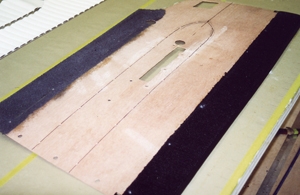
As per the factory, carpet was installed at the bottom section of each door panel. It is hemmed with material on the exposed bottom edge and is then glued in place.
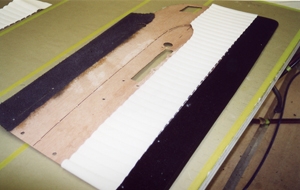
After marking with a straight edge and sewing the leather pleats exactly on those lines we have perfect pleats on the bottom half section. At this point we now glue it in place.
The same shim, sew and glue system was repeated on the upper section to give this look. Stainless steel panels are then attached in the arrow shape seen to finish off the panels.
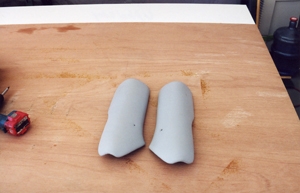
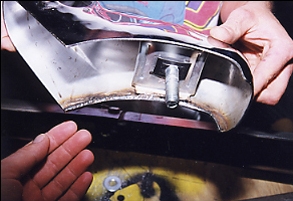
Convertible arm rest covers hide all the hydraulic top lifting cylinders and have been made in metal and plastic with a vinyl grain. Our covers are from a 50s Caddy and are steel covered with upholstery. As seen we have covered them with a pad on the top section first to allow a comfy arm rest base.
Metal covers usually have a lot of irregular shapes and are in need of heavy padding. We often need to have water proof 1/8th thick cardboard sewn to the back sides before installing. The pleats are traced with a straight edge and sewn right through the board for strength.
The ash tray was fitted with relief cuts sliced on the leather to allow a tight fit. Carpet was then glued down on the bottom as per the factory style. This cover is ready to go.
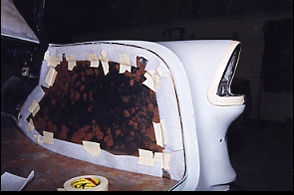
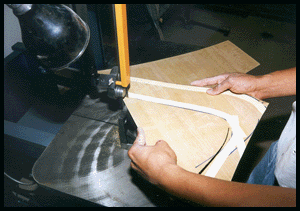
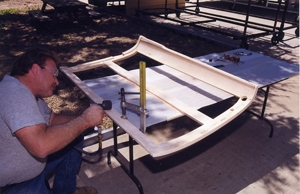
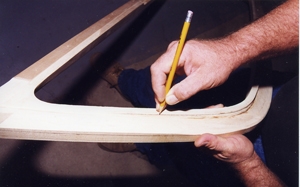
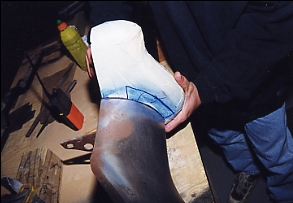
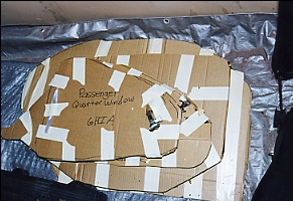
We will make our own headliner if none is available and/or we have fabricated a custom roof then a custom drop down headliner needs to be made. We start with water resistant card board and cut a few section and fold it in place. Using masking tape we get roughed out.
As seen a few specific areas are marked to get us some references points and we are ready to do our first fit inside the vehicle.
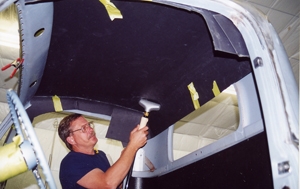
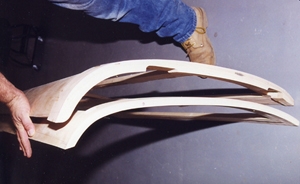
Using the Jiffy steamer we can pretty much tell the cardboard what to do with little manipulation by hand. After about an hour it has taken shape and is ready to trim and start the foam work.
Special headliner foam that will tolerate the gravity of a constant pull when installed in the vehicle is used. 1/2 thick is what we use. It is now ready to be covered and attached with special fasteners to finish it out.
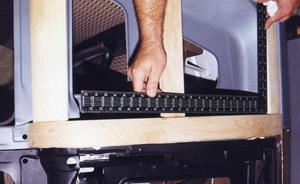
We went on to the door panel and fitted arm rest to the truck
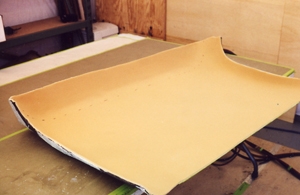
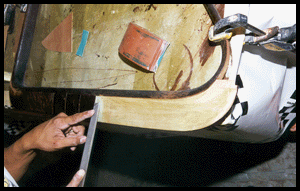
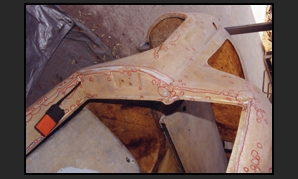
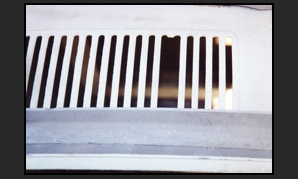
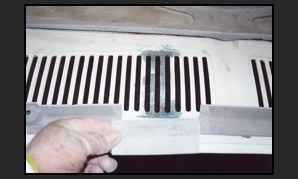
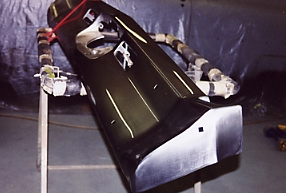
On Custom Cars and Street Rods we often upholster the Trunk panels, floor and rear seat area. Here we have built metal panels to cover the original grooved panels. We then wrapped material the same thickness as our leather around the edges to show us where trimming and or tweaking was needed in order to achieve an exact fit.
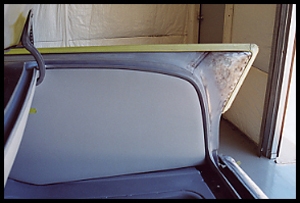
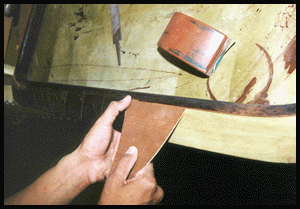
After gluing down 1/4 inch foam we stretched grey leather around the newly fabricated panels and they look great.
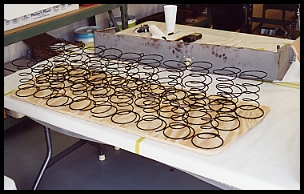
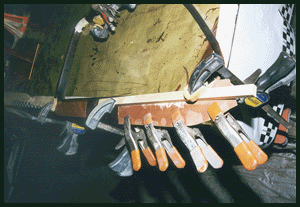
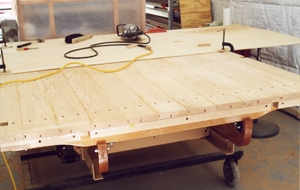
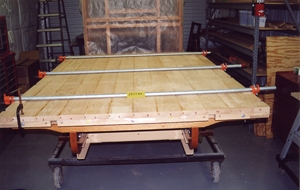
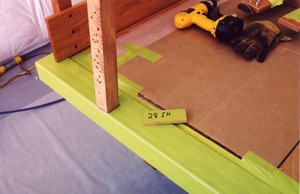
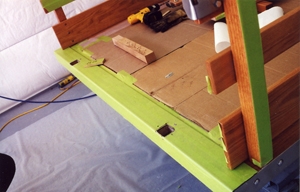
Starting in the early 1900s automotive seats were built using individual coils as supports. On concours original vehicles we build seats of this vintage the same way. As seen on this 28 INT project we started with a 5/8 plywood base and attached coils in rows held down by clamps and screwed to the wood. We also attach burlap straps to pull all the coils in tight toward one another to keep them firm.
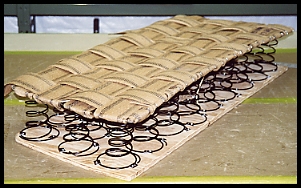
As seen we have completely covered the top of the seat with burlap before building the cover. We will now add 1.5 inches of top foam.
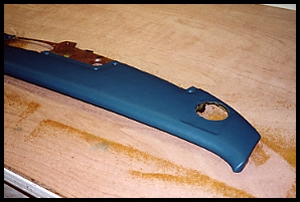
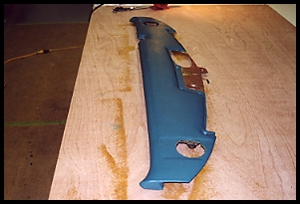
Often we can purchase NOS vinyl covers and adhere them to their perspective dash board. As seen Jeff is working the cover around and over all the shapes and contours on this 57 T-Bird dash. After final fit it will be vinyl dyed white as is the chosen interior color.
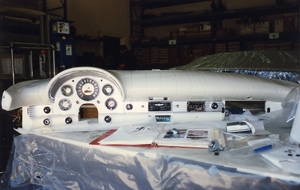
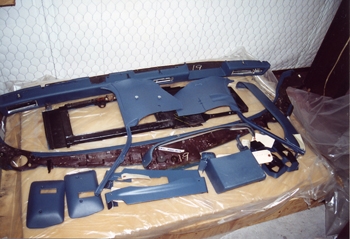
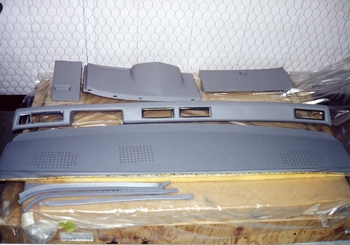
Looking good and dyed to match the upholstery color the new dash is ready to mount to the car.
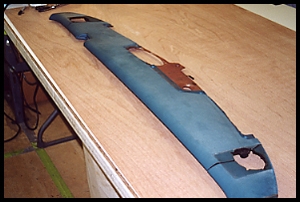
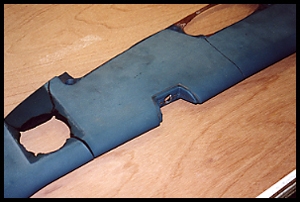
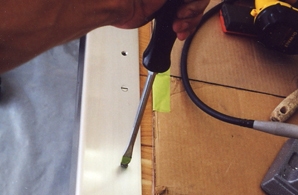
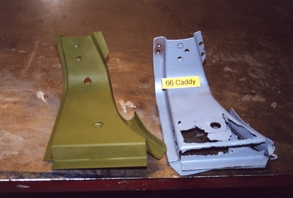
More often then not there are no dash covers available and we have to repair/restore the existing Dash pad. We have to pull out our bag of goodies to accomplish this on the many styles of dash pads. As seen this 66 Caddy pad has huge cracks and needs a lot of attention.
We start with lacquer thinner clean up of all vinyl for adhesion to remove all dirt and any unwanted deposits. We then fill the cracks with vinyl epoxy to level them out and hold down the old vinyl on the edges.
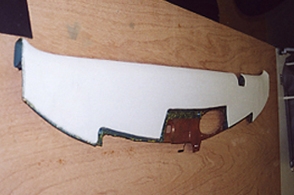
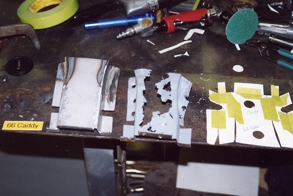
We then cut out a section of our expanded dura foam which is very taunt, yet it gives a bit for the new vinyl to pull/stretch around it. We are using 1/4 thick material on this application. Foams and sealant/adhesives to hold them adequately are the KEY to doing world class trim work as they do all the supporting of the covers etc. This is where longevity comes to play and with 46 years of knowledge we save time and that saves a customer big $$$
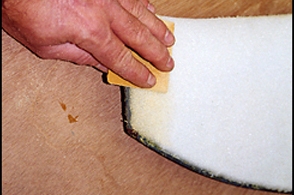
Monte sands the Dura foam "special mix of our own" to contour the edges down to the original vinyl.
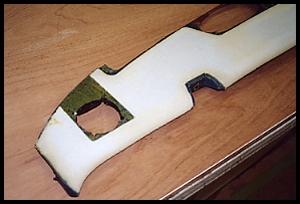
As seen the foam is sanded smooth on all edges and the cut outs are trimmed including the speaker holes to allow room for the speaker grille covers.
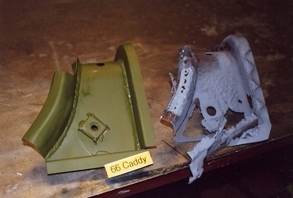
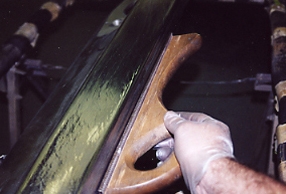
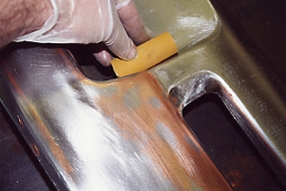
We have chosen the correct shade vinyl for the project. The vinyl thickness and backing is the key to allow proper stretching around all contours. Monte lays out the vinyl and pulls the ends first. Once he is satisfied he removes the cover trims it a bit more and then sprays a special thin adhesive to the back side and foam. This thin adhesive adheres to the Max while not showing and or raising any bumps in the texture of the cover.
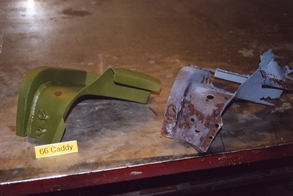
Pulled tight and stretched properly it is beautiful and ready to assemble to Car.
Another view shows a skin tight cover finished to perfection in very little time.
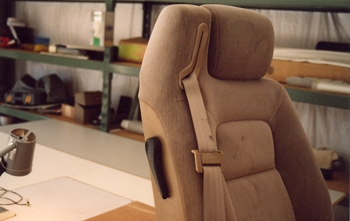
The Torino gets some custom one of a kind seats. Being a convertible we are starting with Chrysler Sebring seats with the retractable seat belt system originally made for a convertible. A set of used seats were purchased from a parts car as they are not sold new from the dealer only parts are available.
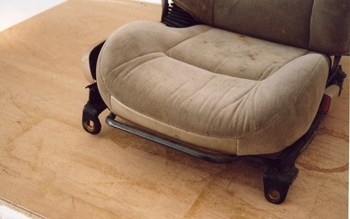
The bottoms have the adjusting rod on the passenger side and fully powered on the driver seat.
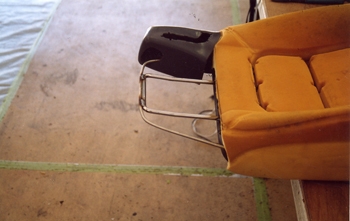
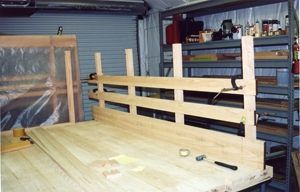
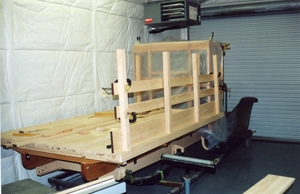
We want to remove the double hump look from the seat so we start by running some rod to re-shape the outer section of the head-rest in to a single shape.
Once we welded the rod to the factory brackets we installed webbing on and around the steel and on to the next step.
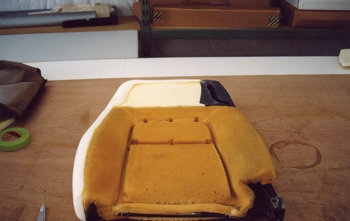
We also added extra foam to the inside section of the seat to make it more symmetrical side to side.
We mocked up a vinyl cover to get a look at what she will become and make our patterns. A little tweaking is needed to remove all the wrinkles.
The back side is the same, a bit of tweaking.
Side angle shows she is pretty close, with a few changes a nice seat will appear.
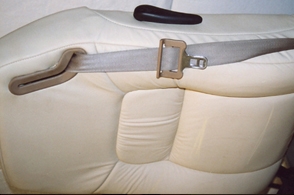
The final seat looks good covered in base ball glove materials. We have to dye the belt loop and install the seat belt and she will be ready.
Looking good, time to build the passenger seat.
We have built many unusual items in the past and this three headed rest is certainly one of them. Getting it all to match and line up is the key including fabricating the internal slide mechanisms to make it function properly. This one goes in a 502 big block 71 Wagon middle seat.

Triple Head Rest Creation

Triple Head Rest Creation
Triple Head Rest Creation
Triple Head Rest Creation

Triple Head Rest Creation

Triple Head Rest Creation
Triple Head Rest Creation
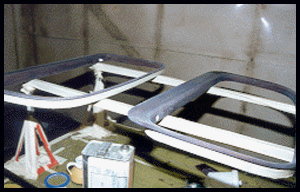
Convertible tops can be custom made or reproductions installed.
Convertible Top installation!
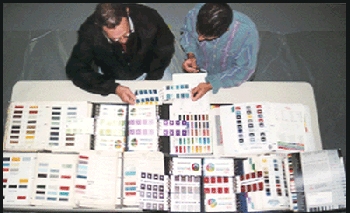
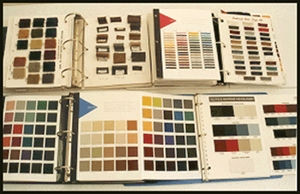
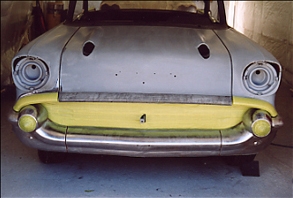
When deciding on the color for your special ride we have every conceivable shade you can imagine to help you in your decision making.
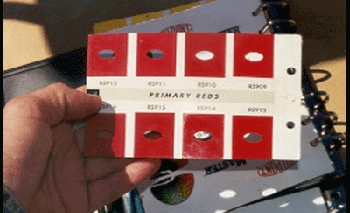
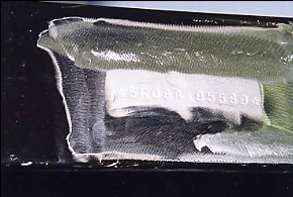
The "Match Master" has small holes to place over your original color sample/part. We always make sure and get this done before all traces of paint are stripped/blasted away during the cleanup phase.
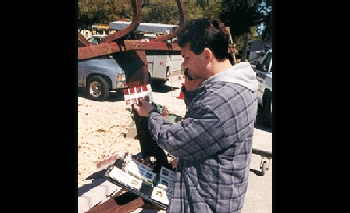
On original restorations we find an untouched area on the body, frame or whatever part that has not been exposed to any elements and we place the "Match Master" on that area. When we find a match we have that shade mixed in urethane.
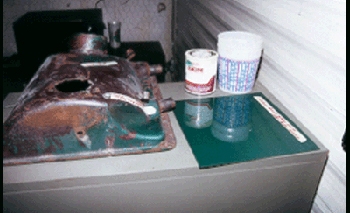
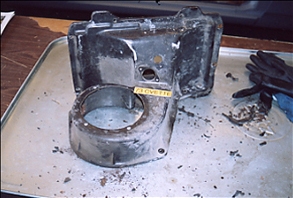
The original part on the left is a 1954 Cadillac heater cover, it shows a clean untouched shade of color. We mixed up a sample, sprayed it out and are ready to send the results to our customer for acceptance.
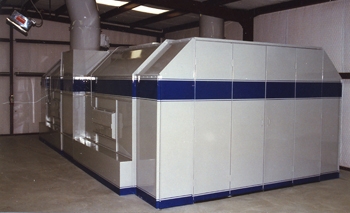
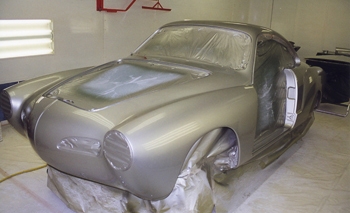
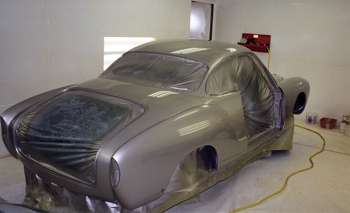
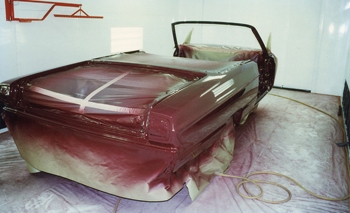
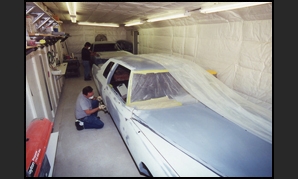
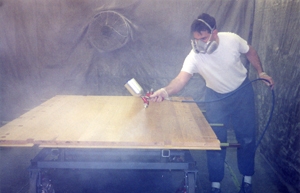
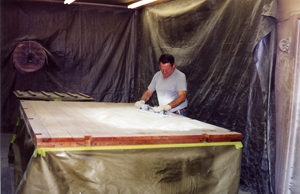
Our spray booth will accommodate any size vehicle/parts from Duesenberg to Ferrari and is meticulously maintained for the utmost cleanliness to ensure the cleanest finishes.
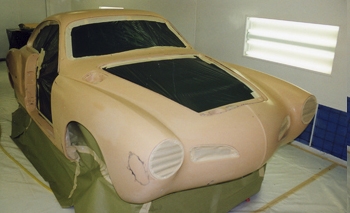
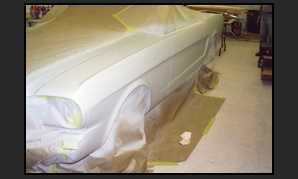
Preparation before and during paint is a critical time. Cleanliness, height of body, masking and how each coat is applied in correlation to the break points of a body make all the difference in the world when you push the envelope day after day.
Paint Booth
Paint Booth
Paint Booth
Paint Booth
Paint Booth
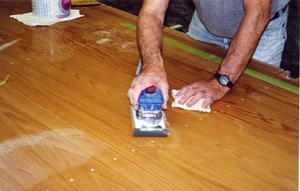
After color sanding Nat is now machine buffing the paint for the ultimate finish.
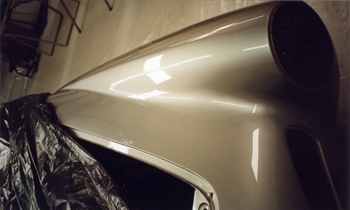
Polished up and looking gooood!
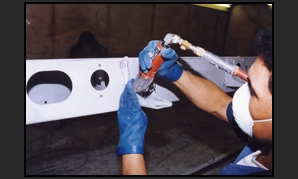
When we polish small parts we have to use smaller tools. Urethane paints do not buff well by hand so we have to improvise. Here Bill uses an 1800 RPM drill with mandrel and special buff pads. This is the correct RPM to accomplish this task and get the job done efficiently.
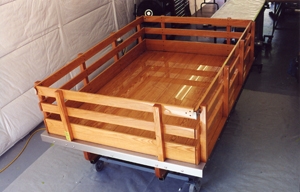
We polish unusual areas like inside this truck bed as nice as the exterior is done. Show quality is our game Jeff Lilly Resto is our Name!
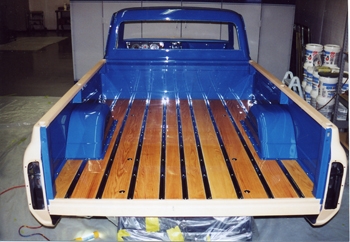
Not only do we polish our paint to perfection but we also do wood quite well as seen the inside of this beds paint/wood work is stunning.
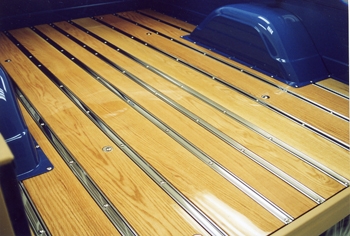
We take a look from another angle and the Spanish Red Oak is gleaming!
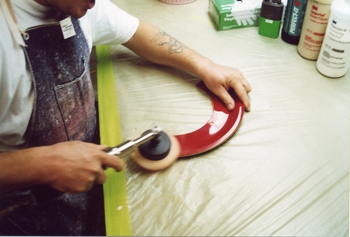
Polishing small parts to the same level as a body panel takes special techniques. Britt has color sanded this brake dust shield with 2000 grit and is now polishing it with 3M finesse using a mini air buffer.
A special table with shielded sides contains all buffing materials while taking the part to the highest level of paint excellence.
Customers often want to change the color of their interior and many of the parts are plastic.
Cleaning plastic and vinyl parts with detergent and then a lacquer thinner wash is mandatory to remove all silicones, release agents etc. Special adhesion promoters we have tested and used over 30 years are then applied.
The top coats are matched to the customer taste including color shade and gloss level etc.
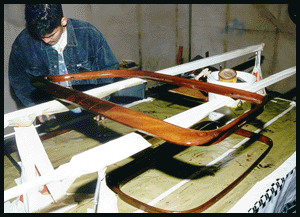
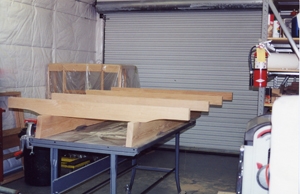
Side photo of a woody shows perfect alignment of wood. This takes time to fabricate steam bent bows and fit trim etc.
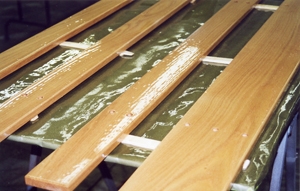
The back side of any laminated boards must be trimmed then fitted back to project several times to check for any more trimming that may be necessary.
Proper grooves and joints for attaching wood together. From biscuit to dowel rods we use and can do it all with any exotic wood you desire!
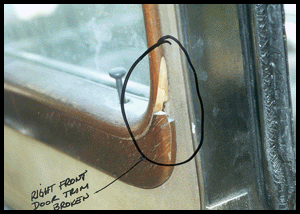
Often we have to repair existing wood that is irreplaceable, such as this Burl wood on a 1939 Caddy Limo. Notice the chunk missing from the interior glass garnish molding!

The original burl wood needs a lot of work. It shows signs of flaking and clear exfoliation.
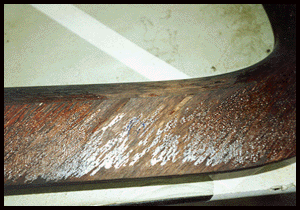
Checked and weathered.
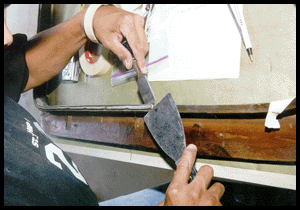
We start by removing all of The window fuzzies and overall dis-assembly of any thing not wood related.
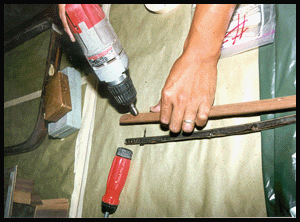
Cleaning out countersunk screw attaching holes is easy with the correct tools and slow rpm.
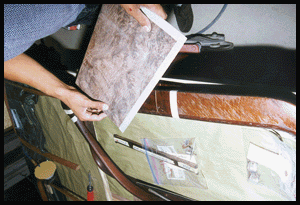
We located and purchased the correct Burl wood veneer and are fitting a template to be cut to size.
Using the band saw to trim out the initial template, we will then sand the edges by hand for the ultimate fit!
We hand file then sand it to fit in place like a precise jig saw puzzle!
The next step is to fit the smaller and different color section the same as above.
After fitting all panels we glue them in place with lots of clamps "extra hands."
Hand sand every thing level and to an exact tolerance!
Smooth all pieces so they flow together at the same height etc.
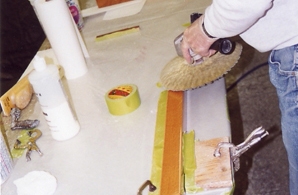
We are now ready to clear. We prep the surface then apply Duratech 800A sealer for adhesion then three coats of Crystal Clear.
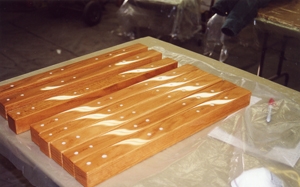
After a minimum 4 hours we then sand the clear with 180 grit then clear again 4 coats and re sand with 400 and clear 4 more coats. Then we sand 600-800-1000-1200-1500 and polish to a mirror finish.
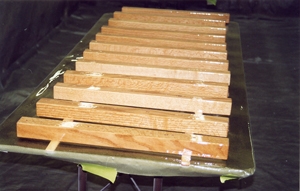
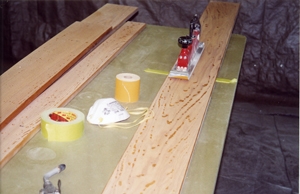
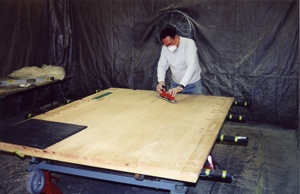
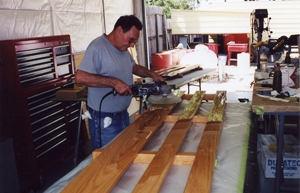
Picking the grain to match side to side and then marking each board is critical and takes a trained eye. Knowing what the Stain and Clear Coat will do to a grain is important when matching boards. Hand picked to look as if one tree for the complete set was used!
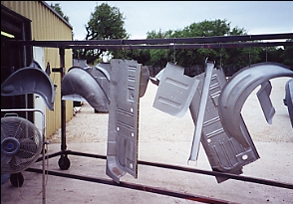
Upper cab wood before and after rotted versus beauty.
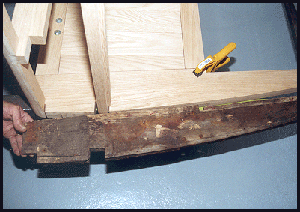
Floor old and new same comparison "Ugly versus Beauty" the age old battle of restoration that we win every time!

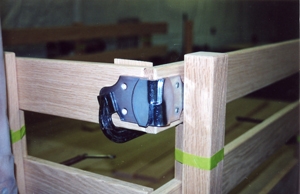
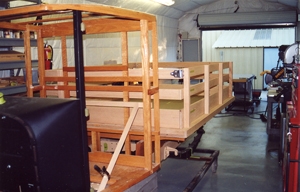
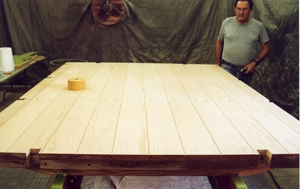
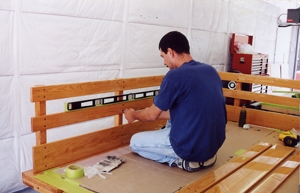
Cab wood goes in place smoothly from all the preparation measuring exactly then cutting and trimming.
Once we are sure of the first fit tolerance we glue and screw some of the sections together using original style screws that are now made out of stainless to eliminate rust and staining problems forever more!
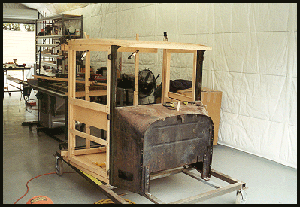
Assembled cab looks good, preliminary measurements are now done ensuring us that every thing is exact. We will now disassemble and apply 4 coats of clear coat to preserve the wood and keep any stains from penetrating and marking the wood during the sheet metal outer skin fitting stage.
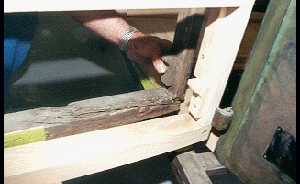
This before photo of rotted wood next to the after shot of Spanish Red Oak reveals the door bottom and complete side by side comparison.
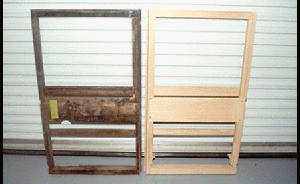
The before and after photos of doors is awesome and shows Bobs incredible talent and love for wood working!
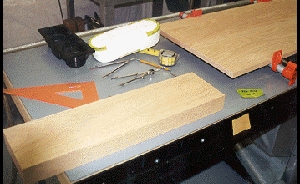
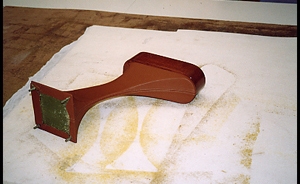
We always start with a template made from cardboard to layout the desired results.

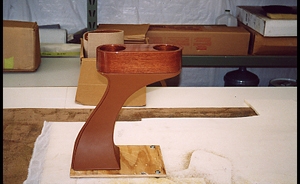
We cut out and sanded the holder to the proper shape and are now using a mortise drill bit to cut out the drink holder holes. This tool cuts a smooth hole to minimize sanding.
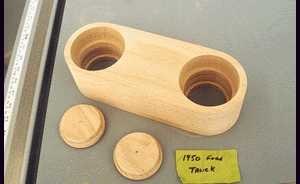
We made plugs for the bottom which will be put in after stain clear and coat. This enables us to clear coat perfectly the inside walls of the holder with no spray back!
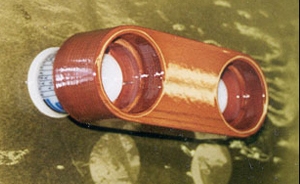
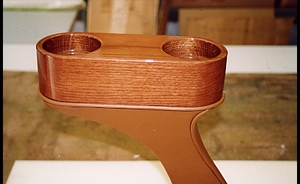
4 coats of clear was applied and we let dry for 8 hours then sanded smooth without cutting into the wood.
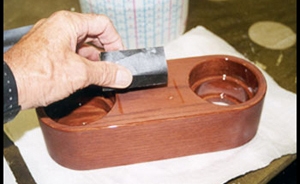
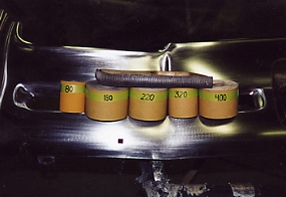
We then sand down with 180 grit paper, clear again 4 more coats then 220 grit sand paper, clear again, sand with 320 and so on with 400-600-800-1000-1200-1500 until finally we sand with 2000 and then polish.
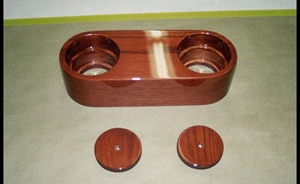
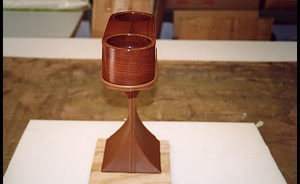
The final result is stunning. Time, skill and patience all add up to one thing, Quality workmanship that is rarely seen.
The final phase will be a trip to the upholstery shop for a brown leather wrap.
Console
Console
Console
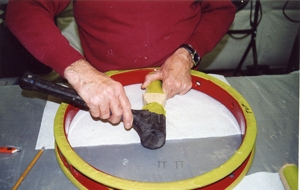
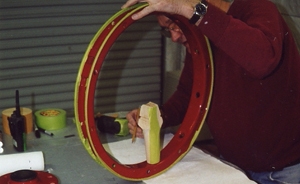
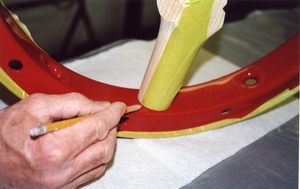
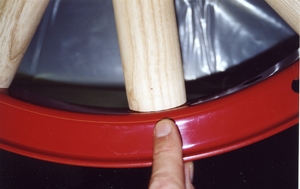
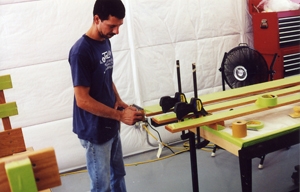
During wood working we encounter many challenges such as fabricating wheel spokes and then trimming them for an exact fit. Bill is tapping each spoke in tight in order to check fit for contour to the rim and then marking, removing and sanding each edge until his desired result.
Wheel Spokes
Wheel Spokes

Wheel Spokes
Wheel Spokes
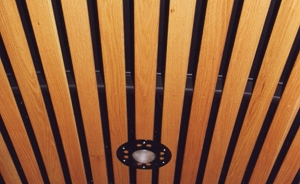
Custom built head liner that matches red oak seats for miles of wood interior.
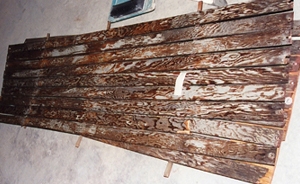
The old wood was used as a template.
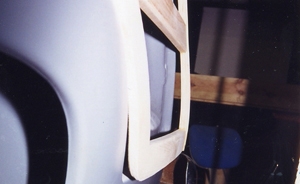
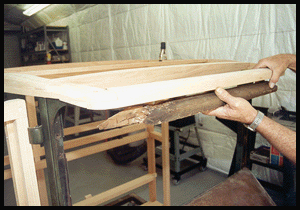
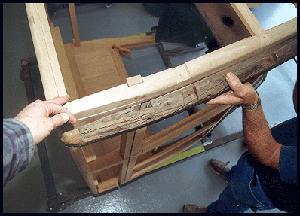
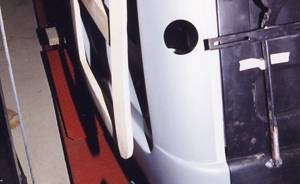
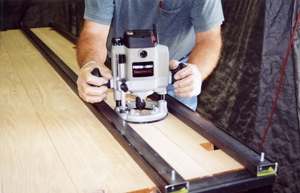
Many customers purchase a pre-fabbed wood kit for their woody and ask us to fit it. As seen we have bolted up one of these "KITS" and it sticks out away from the body 3/4 of an inch. Watch in the next photos as we do battle with this wood kit and make it fit. In general we must trim the back side as the laminated boards would show the layers if ground down from the top side. So it is a time consuming endeavor.
Kit Fabbing
Kit Fabbing
Kit Fabbing
Kit Fabbing
Kit Fabbing
Kit Fabbing
Kit Fabbing
Kit Fabbing
Kit Fabbing
Kit Fabbing
Kit Fabbing
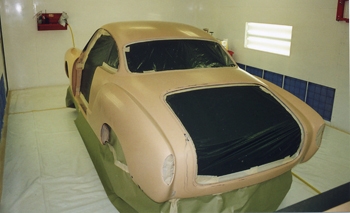
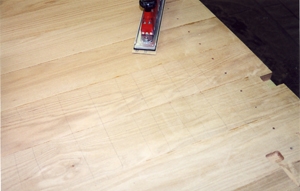
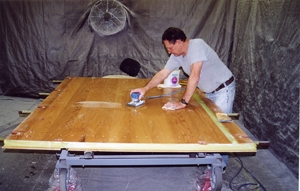
Nat, Bill, Mike, and Jeff have the Block Sanding system down to a science, proper time to cure between primer coats, block size and pressures, contours, sand paper grits, straight edge tools, tracers, limited lighting to find, mark and remove flaws is what it takes to put out a straight body!
We block the body panels together to be sure of panel to panel fit . We then disassemble and paint each part separately.
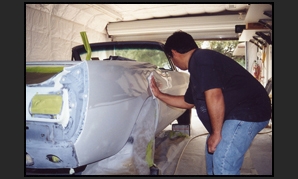
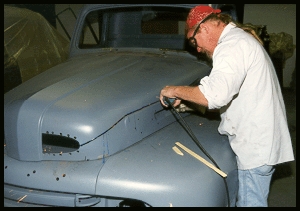
Nat is wetting down a panel to view his work. He will now inspect and mark any flaw he sees to be removed. To achieve world class workmanship is so delicate, one stroke in the wrong direction and you will see it.
As you can see the room is darkened and now you are able to see the smallest details. This is a process that takes much time and know how.

You cannot beat the free oven that Texas produces with plenty of sunlight per year we get a consistent curing rate on all our primer and top coat finishes which attributes to longevity as well as True show car beauty.
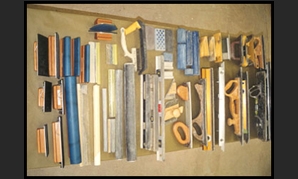
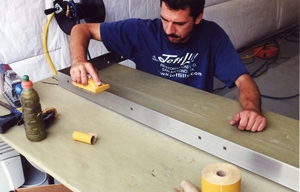
We have manufactured our own Sanding Blocks in every conceivable shape and length. This is the only way to hunt, find and capture the highest level in the refinishing world. 52 blocks are pictured not counting other blocks used for 600-2000 grit color sand work in the painting dept.
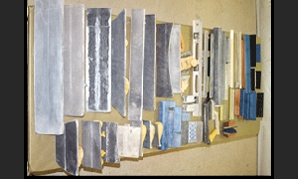
Another view of our 40 to 400 grit blocks shows the double wide, single wide, tapered, short, long, angled, round, convex, concave, adjustable. drip rail edge etc

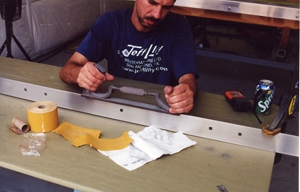
One of our favorites blocks is the angled fender block. This tool enables us to remove the slight waves you would normally see on front fenders just behind the front tire wheel opening.

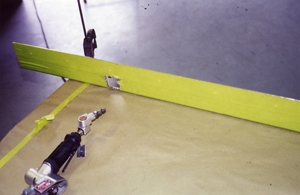
Jeff is blocking out the quarter panel of this 1955 Chevy with a 30 inch custom made double wide block.
To get it done with world class results many sanders are needed from hand blocks like this contoured round block to power sanders we do what it takes to get it done.
Frames and the like demand small power tools and we use a 6 inch and 3 inch round sander to plane the surface and make ready for paint.
This Fein tool uses an angle pad to get in all the small corners cracks and crevices. The smallest areas must be done also to give the customer the best product.
During the blocking stage all Trim parts are stripped of chrome, nickel and copper to bare metal, we then straighten, sand, file and re-copper plate them. They are then refitted one last time. This die cast piece is ready to fit and trim.
Nat is using 80 grit to file a tiny amount of copper/base metal off before we chrome plate. This has to be done in the block sanding shop during the course of the blocking phase. A beautiful trim fitted car/truck makes all the difference in a piece of art!
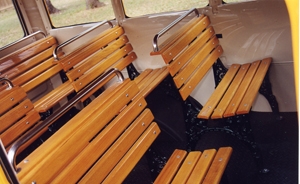
Wooden seats in Spanish Red Oak. Stainless grab handles for easy access.
Fiberglass is a whole different animal then metal and in order to make it stand the test of time special precautions must be taken.
This TVR body is hand laid glass which means pin hole city compared to press molded glass which has no pin holes to speak of. We remove all paint, gel coat and inspect, mark, repair and prep every square inch.
Thorough quality is what we do and your baby was put in our hands to give you the ultimate piece of workmanship. NO STONE WILL GO UNTURNED SO YOU KNOW IT WILL LAST!
Missing glass parts like these louvers are done to replicate.
Once finished no detection of repairs is possible.


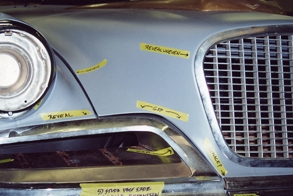
On every project that comes through our facility we refine the gaps to the best of our ability. The goal is to have the body fitted to 3/16 gaps. Depending on what the car will allow based on the factory hinges and catches we will push, pull, cut, slice and weld to achieve the results. Watch what it takes to make it happen.
Body Align Process
Body Align Process
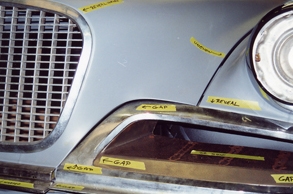
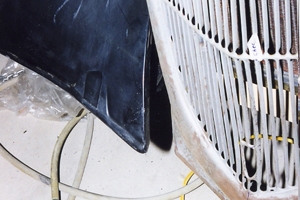
Trim is always a deciding factor on what we are able to achieve. Large gaps from pot metal trim pose many problems.
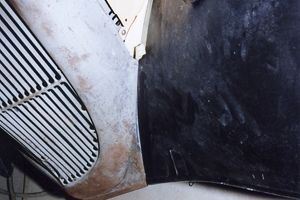
Same on the other side
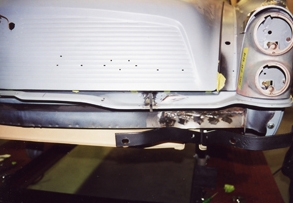
Tail pan was widened.
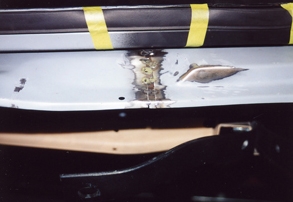
We split then added to lengthen the tail pan panel
Body Align Process
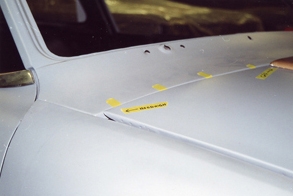
Hood is too high
After adjustments we are now level

Spot welds were cut and the panel was raised to achieve it
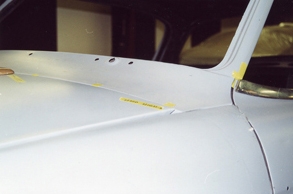
Same on the hood as it was lowered. Then all welds are redone.
Welds ground down.
She looks good.

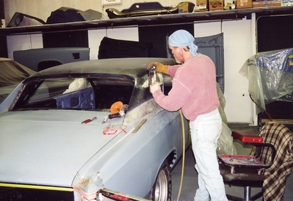
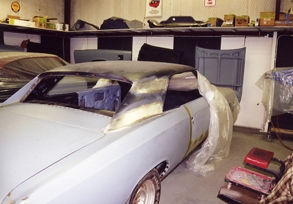
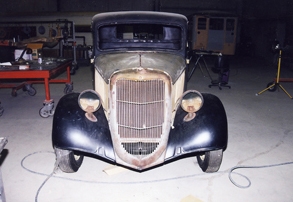
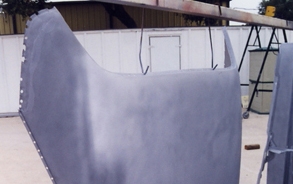
We have taped off this 50 Ford hood and are getting ready to cut 3 inches out to make a more streamlined body for this Custom truck
Rodney cuts a precise line to remove metal and change the body shape forever in a better way.
See the difference yourself in the stock Ford on the left and our Custom project. The roof has been lowered 2.5 inches and the hood had 3 inches removed along with the wheel wells radius etc.
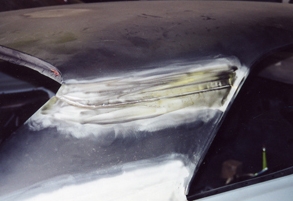
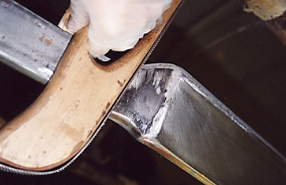
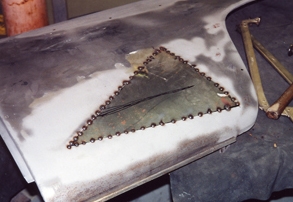
We have installed a new set of qter panels as per the factory up in the roof joint. We will now apply body lead.

Rodney heats up the seams and applies tinning solder. This product adheres to the steel and then the lead adheres to it for complete results.
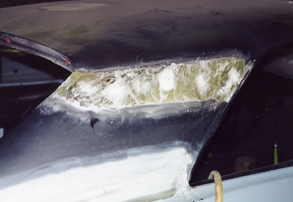
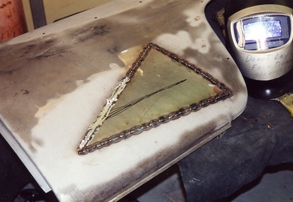
He then heats up and applies lead in a thickness that will allow shaving down and smoothing out to his desired shape.
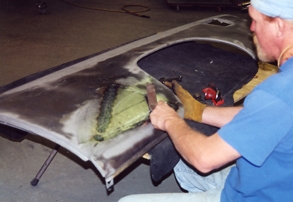
He shaves the lead using a lead file and then uses a board file with 80 grit sandpaper being sure to not cut through the lead and past the tinning solder to the bare steel.
The lead has been smoothed down and is ready for primer. Another old school technique used for proven longevity is finished. Repairing things right since 1957 is what we do!
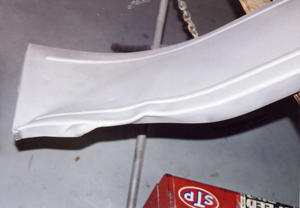
Rust repair is a major part of what we do and 1/2 of the time there are no patch panels for our projects. Watch and see the way it is done as Randy turns it out.
Templates, bend metal
Add fasteners, prime and ready to install
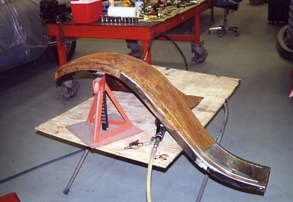
Turned over you can see the arc on this part
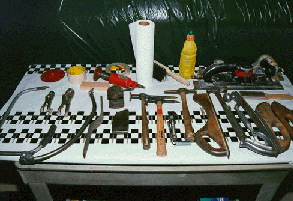
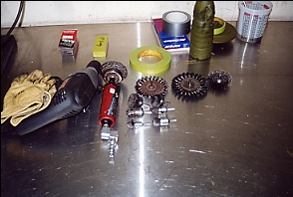
Tools of the trade to get the job done when tackling old metal.
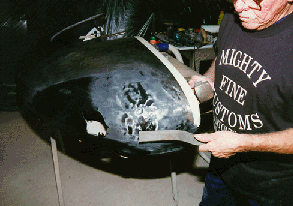
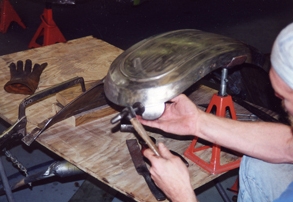
We are sometimes referred to as "Raiders of the Lost Art" and when it comes to straightening metal, Lou can do!
With over 40 years experience he makes pick and filing take on a new meaning.
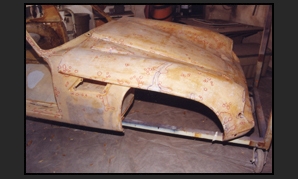
Watch in the next photos as he makes a no filler repair on this 40 Ford Street Rod fender.
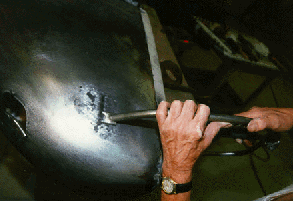
Many of our projects have body panels that have been heavily damaged but simply put are not available to purchase any where for any price. We have the Body men to repair these panels by using their old school techniques.
Proper techniques get the job done.
The metal work is coming along.
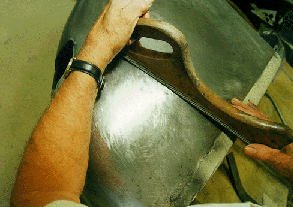
Few final touches
Looking good
Straight and true
Fits nice and ready for cosmetics
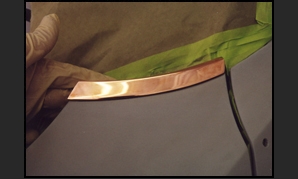
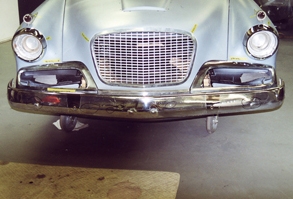
The fit and finish of a bumper is a vital part of any project and we address it for the best results possible. We first remove all chrome, nickel and copper down to the base steel then fit them for correct gap and alignment to the body. At this point we hammer out any dents then file and sand to 320 grit. The last steps are to copper plate then do a light sanding and polish to a brilliant luster before the nickel and chrome is applied for show stopping results.

Fitting the gaps is just as important
Hammer and dolly
Sand paper grits are successive to get results.
File the high spots down.
We use flat files and curved files.
Bull nose for those hard to reach areas.
Then comes the hand sanding to refine and remove file scratches.
Power sanders are used to remove scratches where we can.
Small areas taken out, as seen factory copper is still on some areas.
Long board files help true up the surface.
Wet her down to site and inspect and mark any flaws left.
Round bumpers take extra work.
The radius is actually easier to work then a flat bumper.
Welding edges and grinding to improve fit is mandatory.

Gaps are big and require welding.
Tape marking and filing for better fit.
The results are show stopping.
Fiberglass
Fiberglass
Fiberglass
Fiberglass
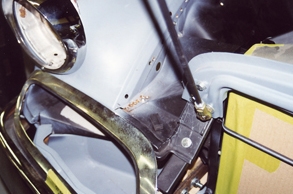
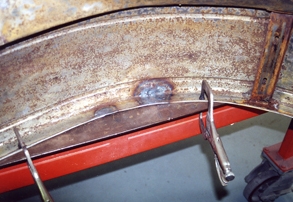
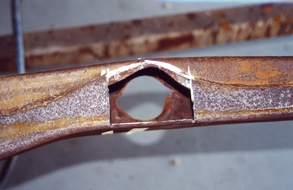
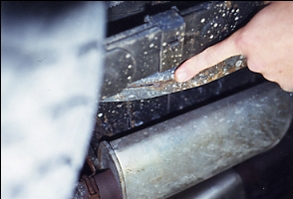
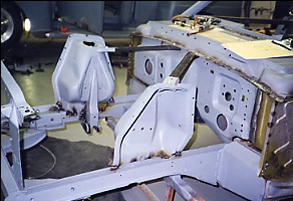
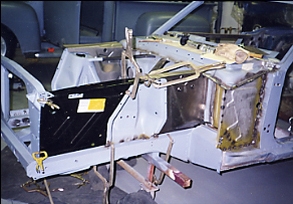
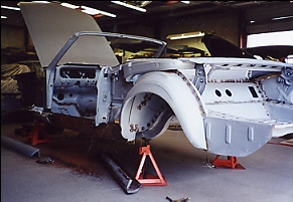
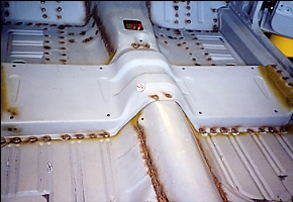
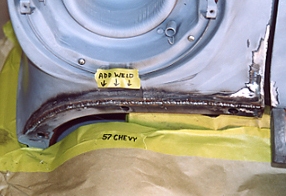
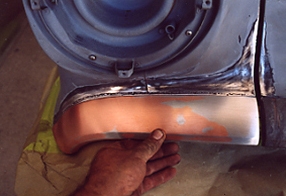
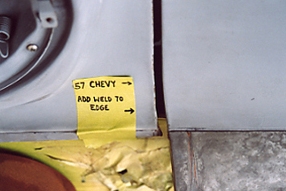
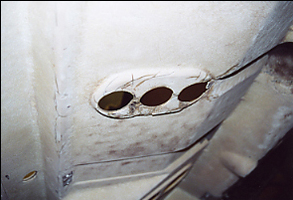
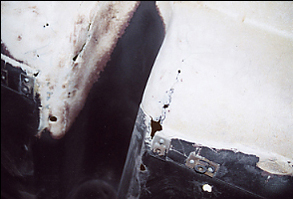
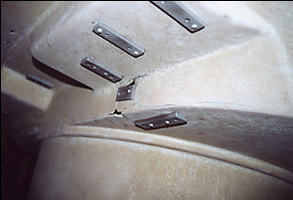
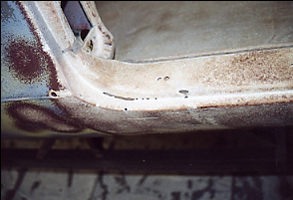
Frames tend to rust out under and around the rubber body mounts from years of moisture. As seen this body mount was not even supported by the frame so the body panels were sagging including the door gaps where they meet the fenders and qter panels.
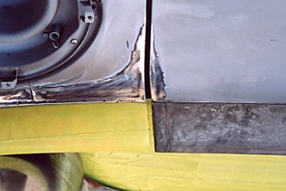
We started by cutting out the rust until the metal thickness was to factory specs on all outside edges.
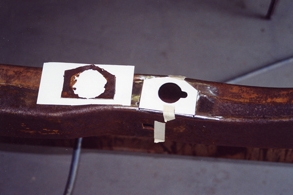
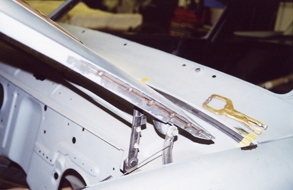
We made a template with the correct size opening and laid it out for proper fit.
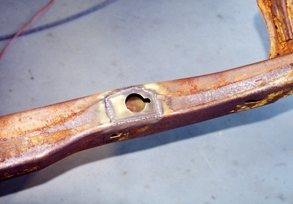
We then made a steel patch in the proper thickness and mig welded it in place.
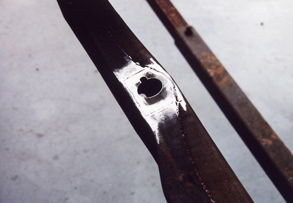
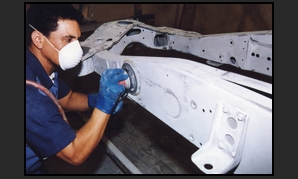
The welds were then ground down smooth then the other 60% of them in need of repair were also restored. We will now media blast the entire frame and prime it.
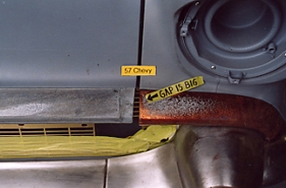
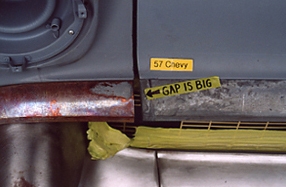
On every projects body we encounter panel gaps that are way off from our required 3/16 fit. Consistency is the name of the game when building top quality vehicles as this makes the difference between a production job and our show stopping results. As seen on this GTX door we have added two 1/8 steel rods to achieve our desired 3/16 gap. Note the small magnets holding them in place to allow for tack welding.
A different view!

Long panels are best done with a continuous rod. We weld at 1/2 inch increments to ensure that NO warping takes place. Then we grind all welds smooth and "voila" beautiful gaps.
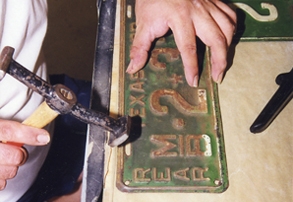
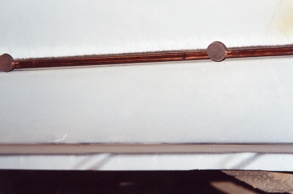
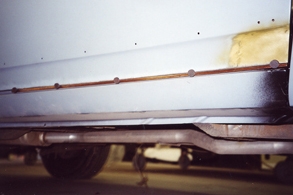
A customer will often request us to restore a license plate of the same year of the project we are building for them. It is best like any other part to start with the best core you can. Here we are using a hammer and dolly to straighten the outer edge first.
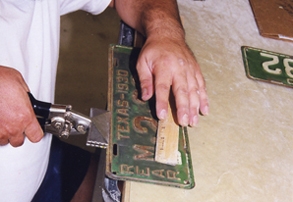
Many tools are used to give us results As seen we are using special pliers that were designed for roofers to do standing seam work. This tool allows us to press the outer edge very straight because of its nice surface and unique leverage capability.
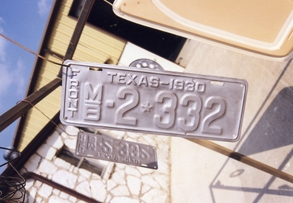
We blasted the plate with aluminum oxide to clean up and aide in the inspection. After clean up we can see that there are a few 1/8th holes that someone drilled in the plate to attach it instead of using the MFGs original slotted holes.
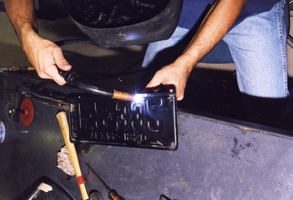
We mig weld the holes and carefully grind them smooth without distorting the thin sheet.
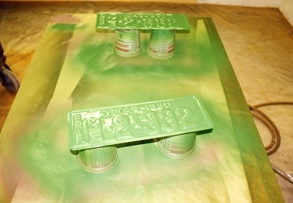
After body work and sand blocking we paint them the correct shade and then paint the letters white after curing.
Die cast-pot metal trim is chrome plated and also painted on many vehicles. Like any other part it gets damaged and needs repaired properly. In the next few photos we will show you the proper repair methods.
Pieces missing are common
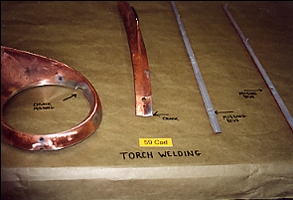
Special weld rod that will copper plate.

Ground down smooth she looks great
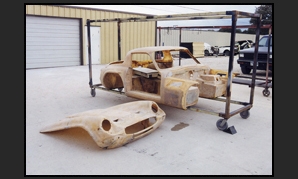
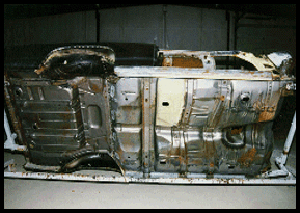
zFrom a small dent to a complete re-body we have tackled many projects in various degrees of condition. This 61 Bubble top Pontiac is the famous Jim Wangers ROYAL Super Duty "Home of the Hot Chiefs" 4 speed Car. Truly a One of a kind.
As seen here the only original panels are roof, fire wall, speaker deck, and inner wheel house.
The Super Duty body is starting to come together, along with custom fabrication we used metal from 12 different cars to gain enough body and frame sections to put her back together again! We also used resistance welders for factory looking welds so you can not tell it has ever been worked on!
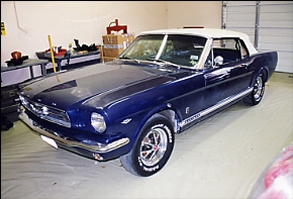
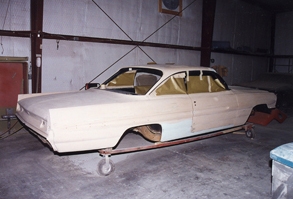
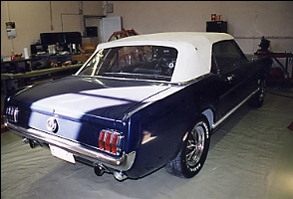
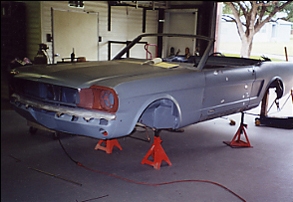
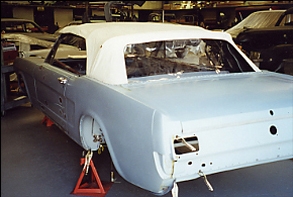
Mustang Re-Body - As the story goes things are not always what they seem to be and what an example this seemingly great condition Mustang CV looked to be. We stripped the paint only to find a car in need of a complete re body. Take a look at what it took
Re-Body
Re-Body
Re-Body
Re-Body
Re-Body
Re-Body
Re-Body
Re-Body
Re-Body
Re-Body
Re-Body
Re-Body
Re-Body
Re-Body
Re-Body
Re-Body
Re-Body
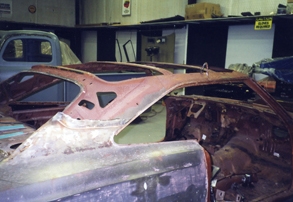
We have repaired, replaced and fabricated every body panel on a vehicle and roofs are no exception. Take a look at the next few photos as we replace a complete roof section.
Drilling spot welds and removing unwanted pieces
Ready top media blast
Blasted and ready to prime
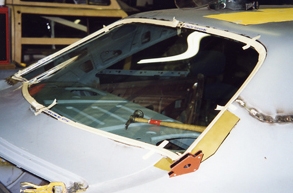
We fit the glass front and back to be sure.
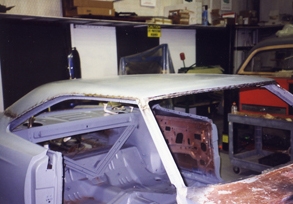
Looks great
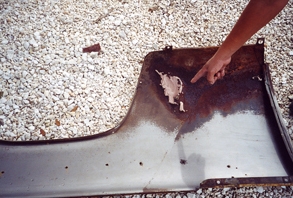
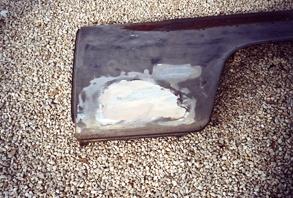
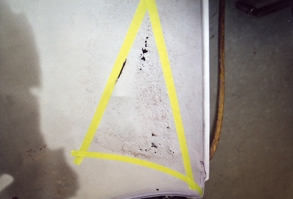
As one would expect we encounter many rusted out sections on the projects we build. Take a look at our large patch replacing techniques.
Rust Patching Process
Rust Patching Process
Rust Patching Process
Rust Patching Process
Rust Patching Process
Rust Patching Process
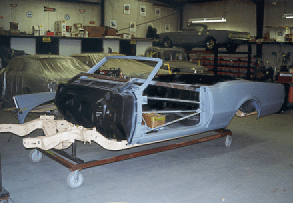
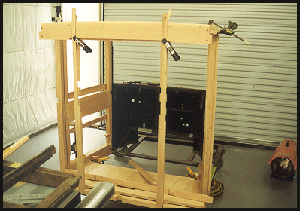
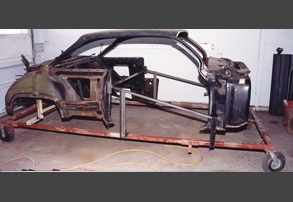
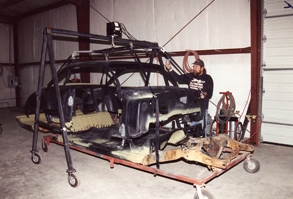
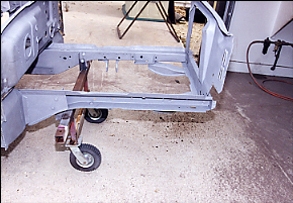
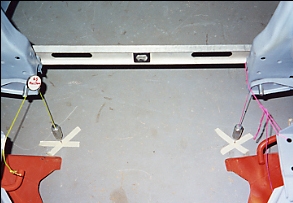
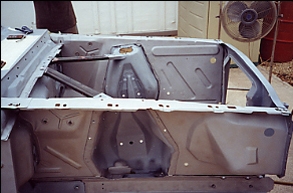
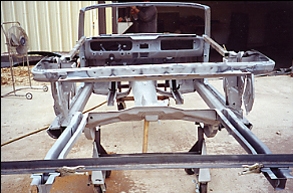
We start by stabilizing the body to frame. Notice the cart to frame supports attached to the same location the suspension would be. This recreates the natural support system which enables us to build a straight body.
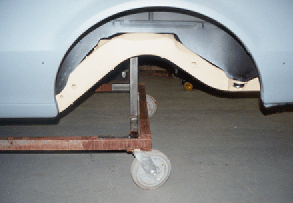
Heavy duty enough to move around in the shops
The highest level paint work includes 3/16 body gaps and flush panel fitting. We are beyond the norm but if you have a job to do you need to do it well. As seen we have cut, sliced, welded and ground the die cast / pot metal to achieve this.
Needs much
A special rod is used that excepts copper plating
file close
hand sand to refine
trim some more to lines
also weld on body to help our cause.
Fits right looks outstanding.

Assemble
Assemble
Assemble
Assemble
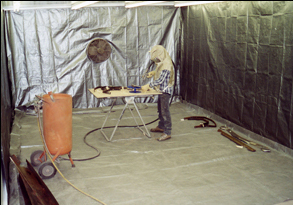
Our indoor Media Shop allows us to blast 365 days per year. When you are able to blast on any given day it helps each project to run smooth.
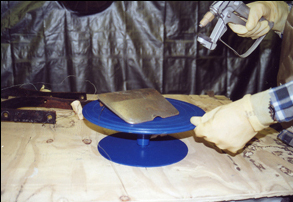
We use special tools including turn tables to make work easier which keeps the body from fatigue.
We use body and frame rotators to ensure every square inch has been done.
Each and every part is blasted to white metal clean and inspected , marked and touched up if needed. Before any primer is applied.
The parts are then sprayed with DP 90- epoxy by Ditzler. The ultimate adhesion and corrosion protection primer available!
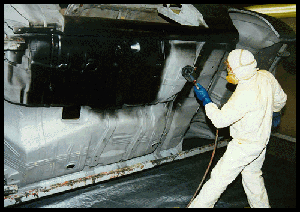
Here Steve is priming the underside of the Chevelle SS with DP-90 epoxy immediately after blasting.
Final inspection of primed parts is also done to check for 100 % coverage.

Over the years we have designed many jigs to accomplish more in less time such as bolt holders during blasting for more efficient work.
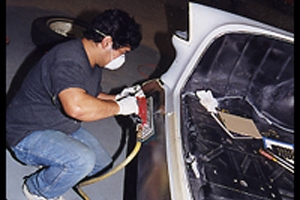
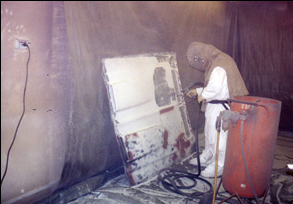
We strip paint using plastic media because of its speed and efficiency. Fiberglass cars like Corvette, Avanti, Shelby Mustangs etc are prime candidates as you must strip paint gently to avoid harming the gel coat and fiberglass strands.
Cleaned down and ready to start repairs. The front clip on this one is heavily damaged and is beyond the cost of repair compared to the new front clip available so we will replace it .

Stripping the body every square inch reveals all of the sin. As you can see the trunk had a stress point and started cracking. As time went by pieces fell out making the hole larger.
Dirt and grease can soak into the glass body around edges and any areas that the gel coat has been worn through to the fiberglass strands. If left unattended exfoliation takes place and the whole thickness of that section will have to be replaced.
When you strip a car down to this level you will find every tiny hole and stress crack there is. As I always say " You can not fix what you can not find" Therefore we must use the techniques and tools to inspect and reveal everything.
Another look shows metal reinforcements that need aluminum oxide blasting after they are removed. We will then prime them using zinc chromate and reattach them using new rivets !
As seen even the door opening has stress cracks where epoxies were used to adhere the separate panels together to form a complete automotive body.
Injection molded parts can be blasted more aggressively compared to hand laid parts and bodies as with the above Corvette. Nat is stripping the paint of this Formula Firebird hood while leaving the factory gel coat untouched.
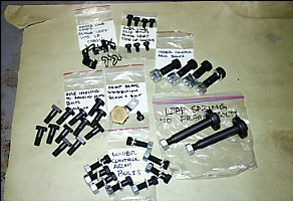
We disassemble, inventory, bag and tag each part while noting repairable condition during the initial stages.
A crew member is steam cleaning all traces of grease and undercoat away from this 38 Chevy Coupe frame before dis-assembly in order to note correct colors and inspection marks. After dis-assembly it will go to the blast booth
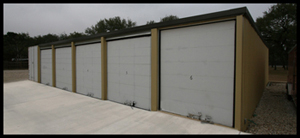
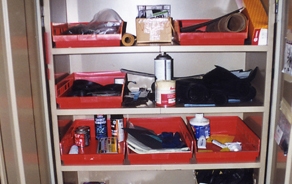
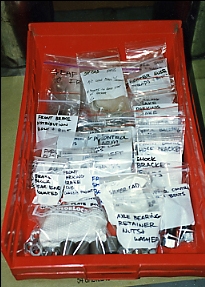
Your parts are organized to a tee in our parts storage areas! We only build frame off projects so we need a lot of dry, dehumidified room to store ten's of thousand's of parts. This keeps them organized and protected while the project is being built.
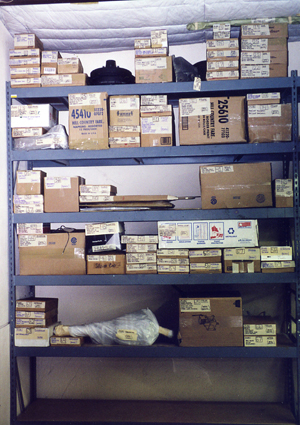
To keep your parts organized and separated. They are listed by number, then bagged and tagged, including every fastener.
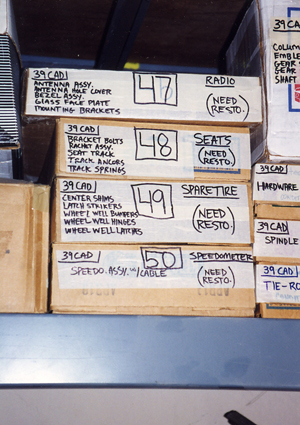
Box by box number by number all kept track of
As seen on our Initial dis-assembly record, the condition and what is required to restore is listed along with the numbered box so it can be instantly located.
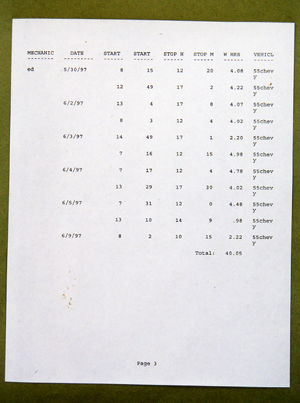
Computer printout
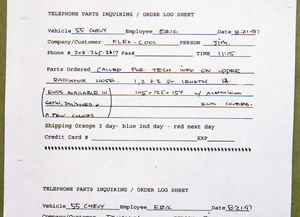
Phone logs of every call made for your trust
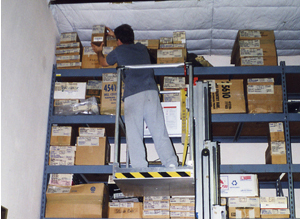
Our Genie powered lift provides easy access to your parts at any time retrieval is needed.
We keep each customers shop manuals, photos, parts, search records and dis-assembly records completely separate and mobile to take to each project if need be.
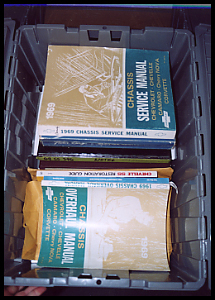
Manuals and every thing needed.

Through the years we have built up a reliable group of parts sources on many models that we can trust to keep their word to us. We also use Hemmings, Thomas Register of American Products and the Internet to find the parts needed for your project!
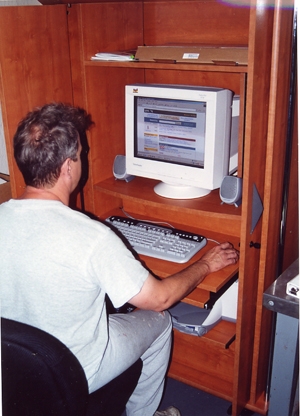
Our mechanical shop computer is used to look for parts on the web. With a super fast connection we are able to do "speed of light" parts searches. We give our customers our best each and every day.
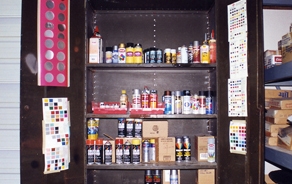
During detailing of small mechanical parts our complete assortment of aerosol paints allows us to match any shade we may encounter regardless of the manufacturer or marque.
Our mechanic/ detailers have their own spray booth for painting small parts.
We can fabricate rubber items such as gaskets, weather strips etc, when there are no such items reproduced for original vehicles and custom fabricated cars/trucks
-
We cad plate many parts during the course of the restoration building process, specifically wear items such as door and hood strikers/catches.
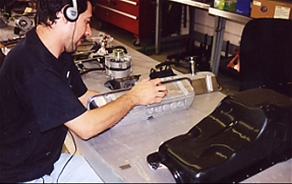
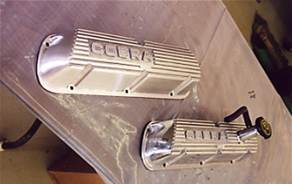
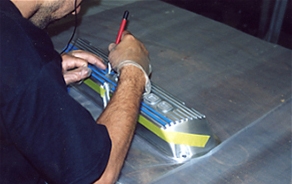
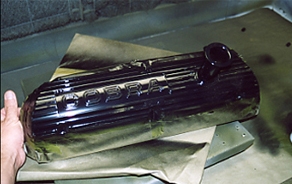
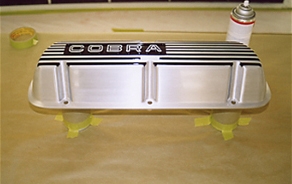
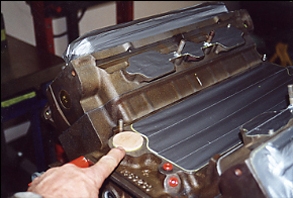
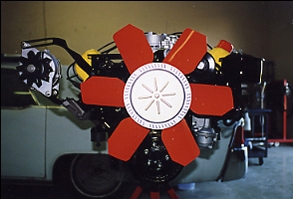
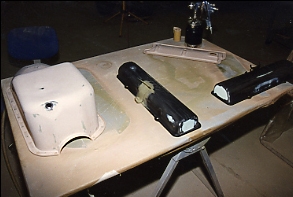
Many Customers want a unique cover for their motor. We can Fabricate custom units from scratch, restore old covers or a mix such as this Cobra cover. Watch as we highlight the main features on this one to give it class!
Custom made boxes are built to accommodate your specific size bumper/parts when rechroming.
Fully padded parts insulated from abusers insure they arrive at their destination safely.

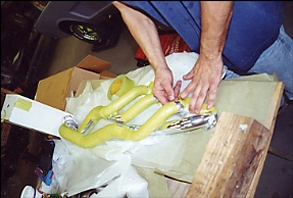
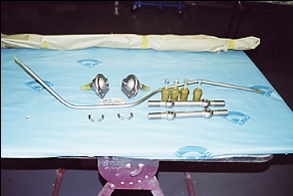
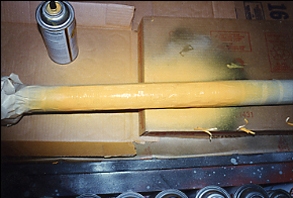
Fuel and brake lines are separated with no weight on top of them to distort their original shape which we carefully removed from your project. They are used as exact templates when storing and mailing them out to be fabricated from stainless.
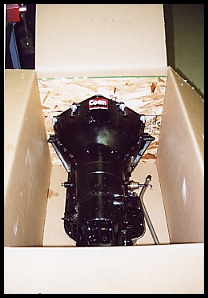
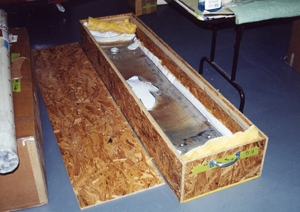
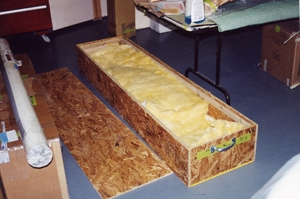
During the shipment of heavier parts we build plywood reinforced boxes that are shipped ups or truck freight depending on the weight limits to assure no damage to your fragile parts.
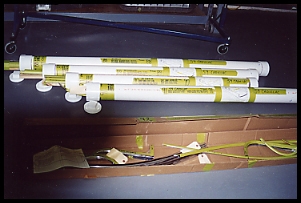
When moldings/trim is shipped we use special containers to pack your rare parts to provide protection from shippers. Quality antique parts are extremely hard to find and any other measure would be foolish. 1/4 inch thick schedule 40 tubing does the job!
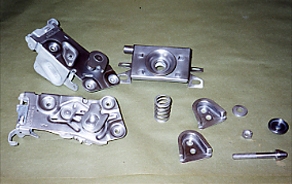
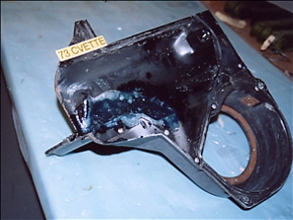
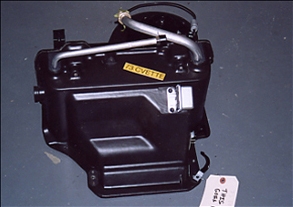
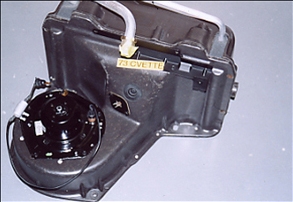
Factory A/C - Heater boxes are rebuilt in our mechanical shop. Check out the before and after photos as Jack performs his mastery!
Assemble
Assemble
Assemble
Assemble
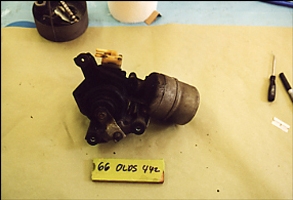
Wiper mtrs are restored on 50s-60-and 70s projects. Lets take a look at a 66 GM unit to see what it takes.
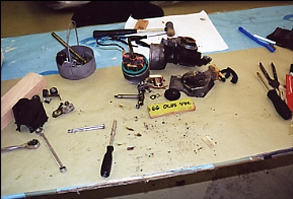
Disassemble and make note of what parts will be needed.
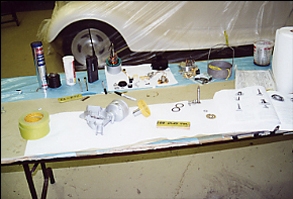
Clean up and detail all parts to perfection.
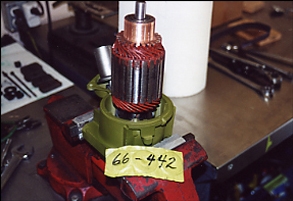
Rebuild all electrical components to the highest standard.
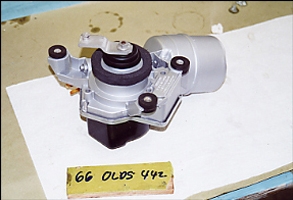
Plate and paint all parts and then reassemble.
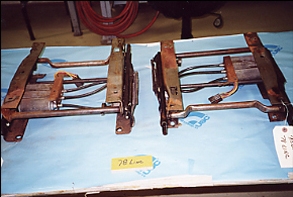
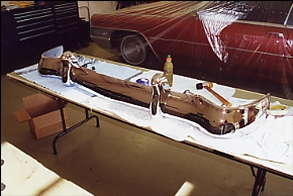
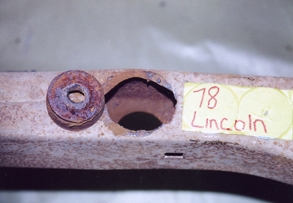
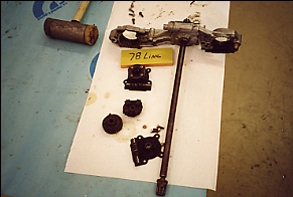
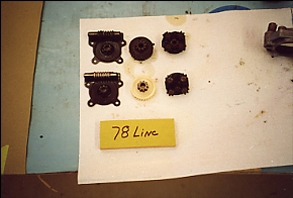
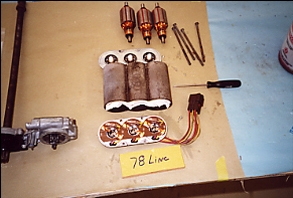
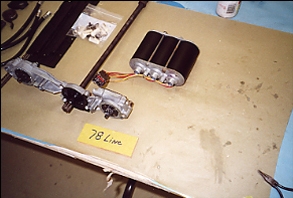
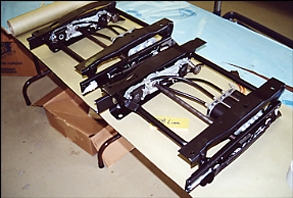
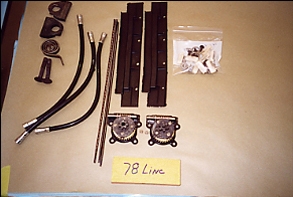
Rebuilding power seat tracks and motors are a regular part of our job with 50S 60s and 70s units needing much attention. This Lincoln system is in need of a total overhaul. Electrically, Mechanically and Cosmetically.
Assemble
Assemble
Assemble
Assemble
Assemble
Assemble
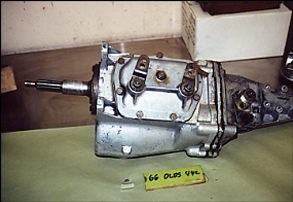
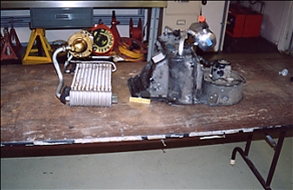
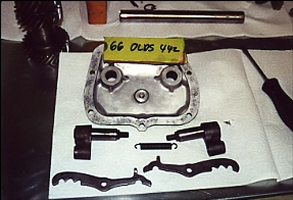
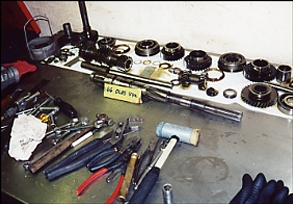
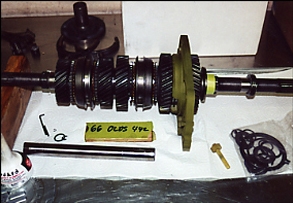
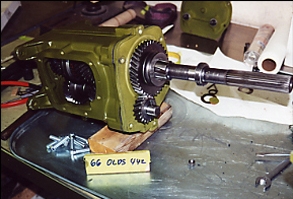
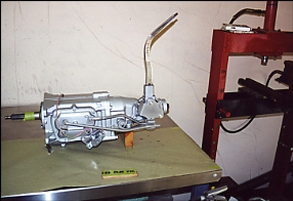
From beginning to end on transmissions we replace gears, bushings and gaskets then prep and paint to better than new!

Assemble
Assemble
Assemble
Assemble
Assemble

Assemble
Assemble
Assemble
Assemble

Assemble
Assemble
When fitting expensive parts that are cosmetically pleasing to the eye we have to protect them while we install them on to your project. We use 3M tape to achieve this. This tape is easily removed when final assembly takes place.
When parts are detailed and ready to final assemble to each project we wrap them for dust and scratch protection. When each and every part is ready for assembly to your project it goes to together quick/fast and efficient.
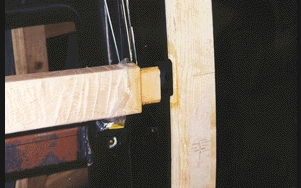
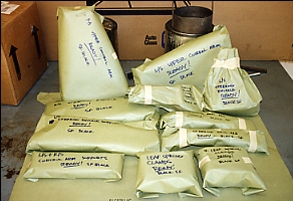
Body mounts on a project are critical when it comes to full frame vehicles. Different thicknesses to achieve the ultimate body gaps are vital and they must be put back exactly during the final body to frame drop. We bag each individual one with location to keep this order and eliminate any mistake!!!
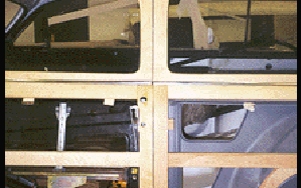
Glass removal and storage is very important when dealing with rare and exotic vehicles. The cardboard "Sandwhich" is the best system for a no problem insured future.
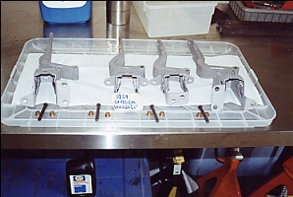
Another important technique is rebuilding door hinges. Being sure to match each hinge for upper, lower, left and right with out mismatching is a must. Keeping them labled during the clean up and rebuild process is critical. The brass/bronze bushings must be matched to the pins.
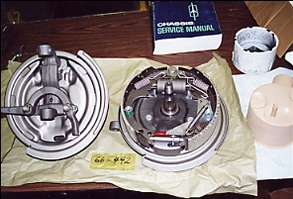
Details make the difference and these brake assemblies make the mark. You will never be able to see them once installed but just knowing it is right with complete photos proving the work has been done sets your mind at ease. Every time you walk out in to your garage you will know, that you know, that you know that we built it right for you to enjoy the rest of your life and on to your heirs for their enjoyment also!!!
Same here we see the ball joints, control arm shafts etc restored and ready for assembly.
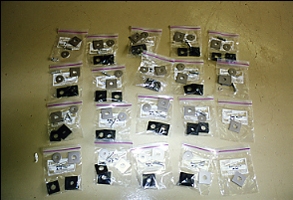
On full restorations every nut bolt and clip has been gone over, bagged, tagged ready to go!
Like an assembly line we get them all ready to go. All of our projects go together quick and smooth like a fine tuned instrument because our system works!!!
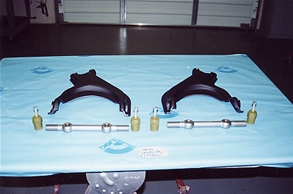
These control arms are ready to be installed on a concours project.
When dealing with concours projects we often have to paint original I.D. numbers and markings on parts such as driveshafts and other suspension and frame pieces.
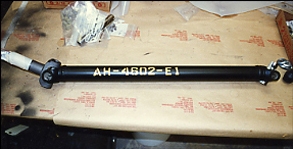
As seen up side down markings were common on parts such as this shaft. Using stencils and paint daubs we do it all.
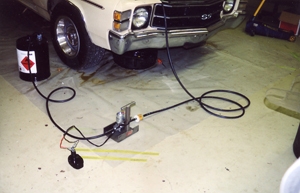
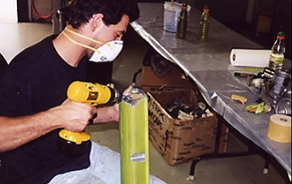
During dis assembly each project will have old gasoline in their tanks which needs to be removed and disposed of properly. We use a fuel pump mounted to a stand and simply attach it to the fuel line at the motor and drain the tank empty.
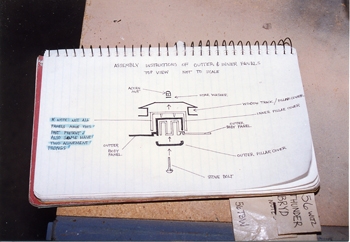
These body panel and side structures were a special chore to fabricate. We had to draw a blue print of them to assist us for reassembly. This is done on a regular basis as many projects do not have manuals that show such items in detail.

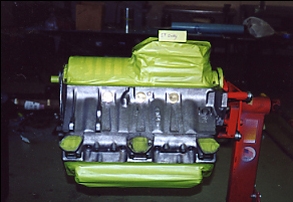
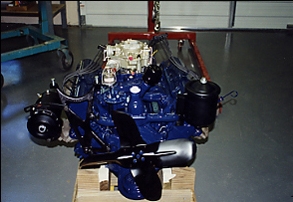
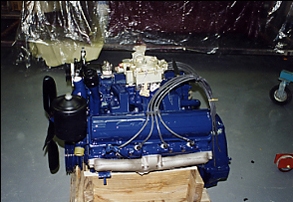
66 Fury 383
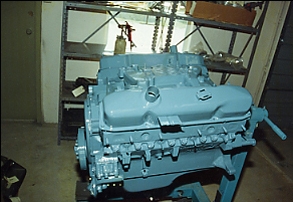
Painted Chrysler Blue.
Looking Good
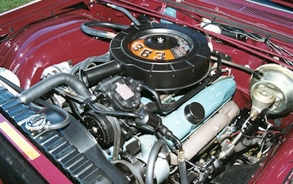
Finished
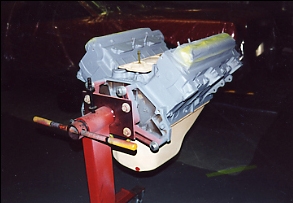
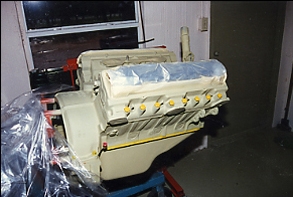
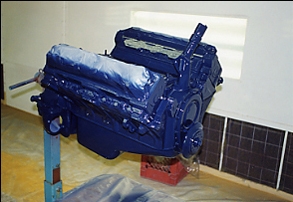
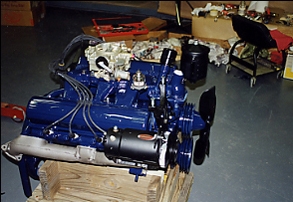
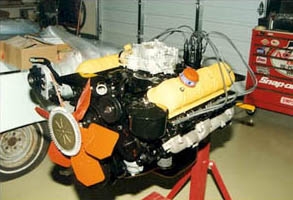
59 Caddy Engine
Assemble
Assemble
Assemble
Assemble
Assemble
Assemble
Assemble
Assemble
Assemble
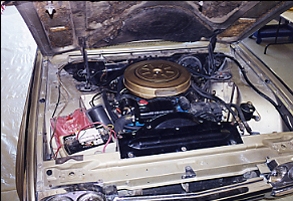
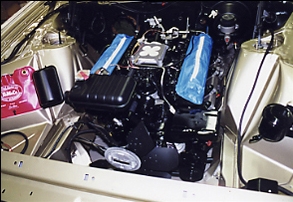
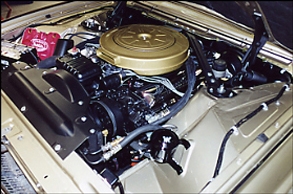
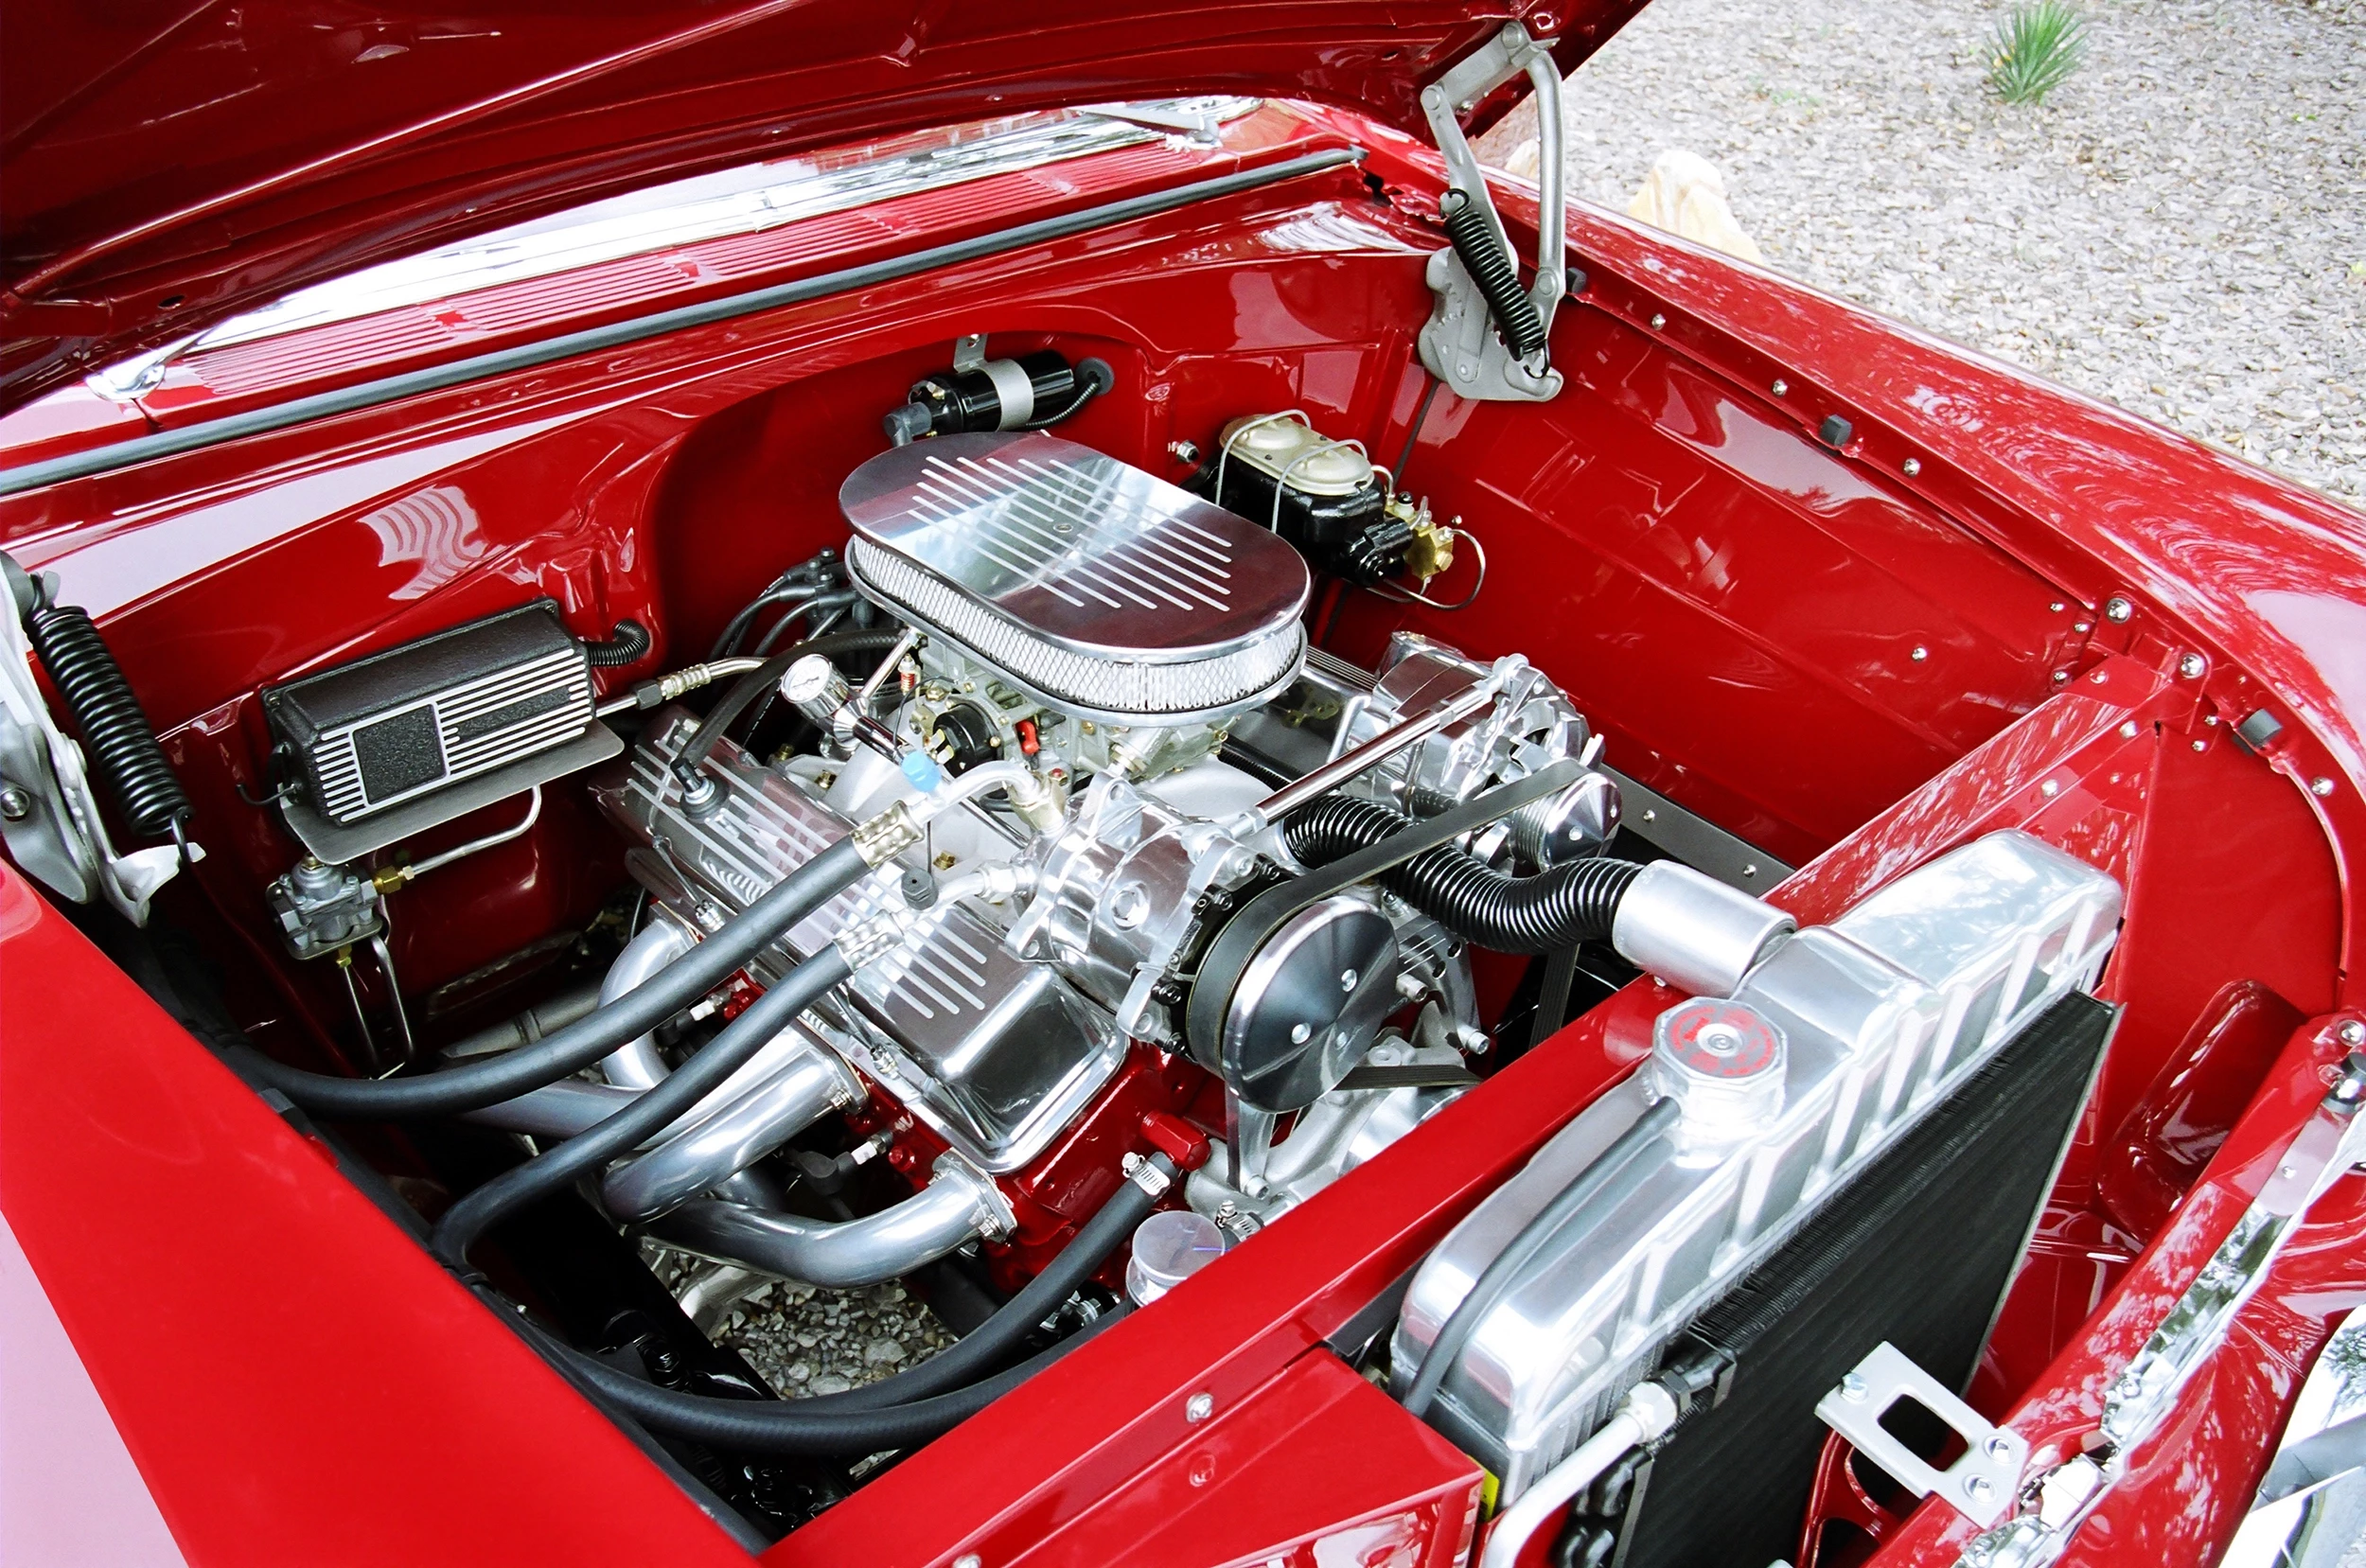
63 Tbird Mtr/Engine Bay
Assemble
55 Street Rod 383 Stroker

Assemble
Assemble
Assemble
Assemble
63 Studebaker
Assemble
Assemble
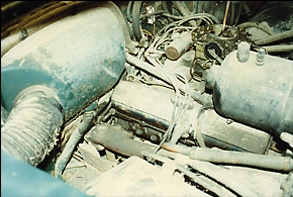
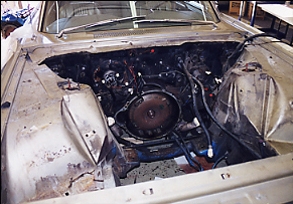
54 Cadilliac, Dirty And Ready For Our Services
Assemble
Assemble
Assemble
Assemble
Assemble
Assemble
Assemble
Assemble

Assemble
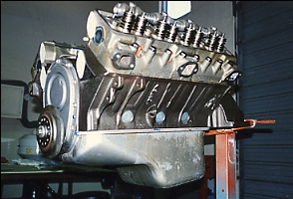
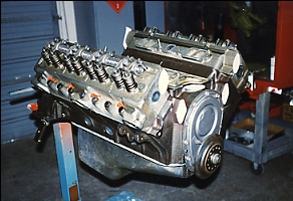
'63 GT Hawk 289 V8 Motor... From dirty... to done right !
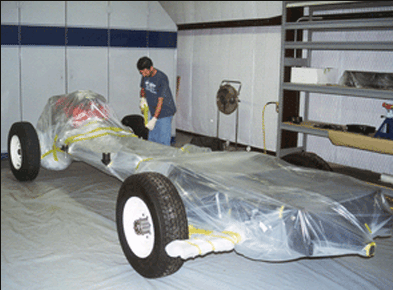
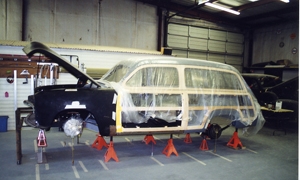
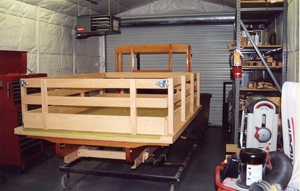
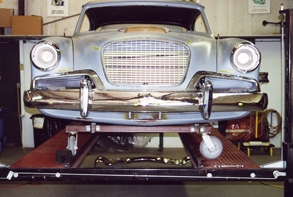
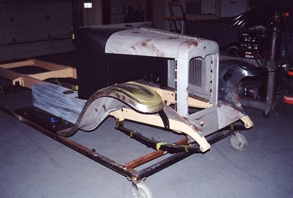
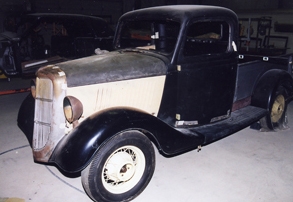
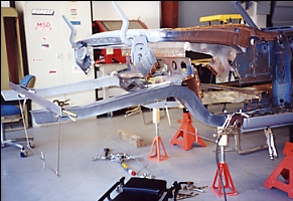
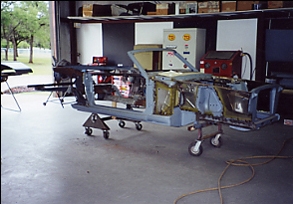
This 71 Truck chassis has just finished being assembled including test starting the drive train. The body will be set back on it for final sanding in the block sand shop. We wrap each chassis for total protection from dust. Note the body mounts for body/cab above the plastic. When the body is painted and polished we simply peel away the plastic protection to reveal a clean machine.
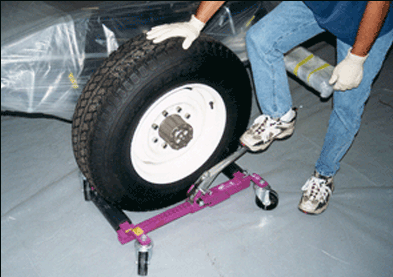
We use many special pieces of equipment including these Go Jack car dollys which pick up each tire above ground with a simple foot press and click. This enables us to move the chassis in any direction to line up the body and frame during body drop. Which makes it safe. Look MOM! NO SCRATCHES
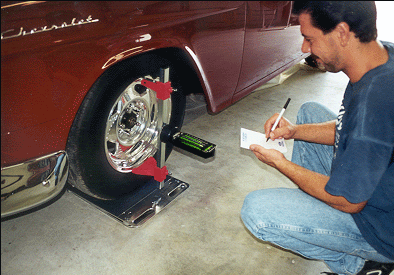
Eric, checks the caster and camber during alignment of this 55 Street Rod. We took the car for a test drive that day and she was as steady as can be. Great work Eric!

The tire scribe establishes the center line of the tire to give a reference point for exact toe.